Easy Homemade Bread Recipe – Bake Your Own Today
Homemade bread is more than just a recipe; it’s an aromatic invitation to a slower, more satisfying way of life. There’s an undeniable magic in transforming simple ingredients – flour, water, yeast, and salt – into a warm, crusty loaf that fills your kitchen with an non-intoxicating scent. We love homemade bread because it speaks to our primal desires for comfort, nourishment, and connection. The process itself is a meditative ritual, a chance to disconnect from the digital hum and engage with something tangible and grounding. What truly makes this artisanal endeavor so special is the unparalleled texture and flavor you achieve, a depth that store-bought versions can rarely replicate. Imagin extracte the satisfying crackle of the crust giving way to a tender, chewy interior – that’s the reward waiting for you.
Why We Adore Homemade Bread
The Joy of the Bake
From the initial mixing of the dough to the final, glorious bake, crafting your own homemade bread is an immensely rewarding experience. It’s a tangible accomplishment, a delicious testament to your patience and effort. This isn’t just about sustenance; it’s about creating memories, sharing love, and indulgin extractg in the simple, profound pleasure of truly good food.
Homemade Bread
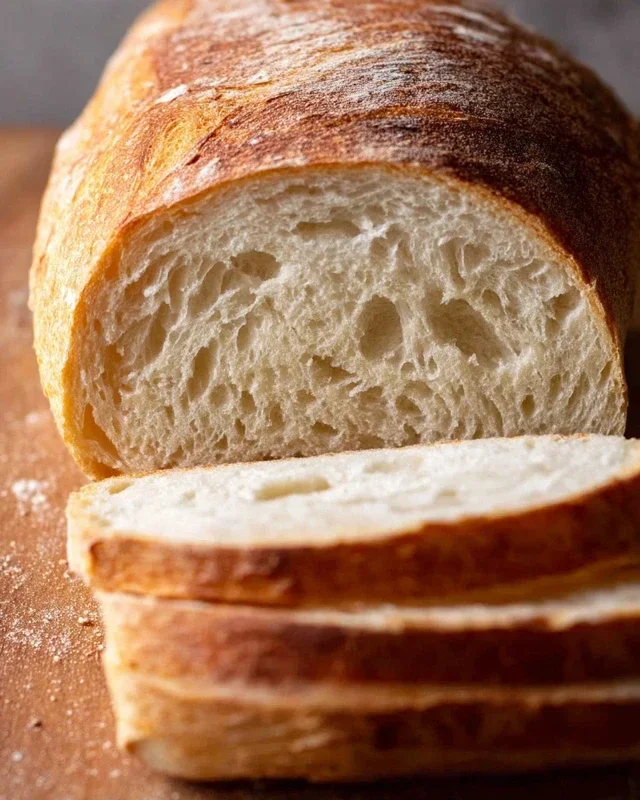
There’s something undeniably comforting and rewarding about pulling a warm, crusty loaf of homemade bread from your own oven. The aroma that fills your kitchen as it bakes is an experience in itself, and the taste? Well, it’s a world away from anything you can buy at the store. Forget those intimidating recipes you might have seen; making delicious, basic bread is surprisingly achievable, even for begin extractners. With just a few simple ingredients and a little patience, you can master this fundamental baking skill and impress yourself, and anyone lucky enough to share your creation. This recipe focuses on a straightforward, reliable approach that will yield a fantastic loaf every time. Let’s get started on your journey to homemade bread bliss!
Ingredients:
*Note on flour: While all-purpose flour works perfectly well for a softer crum extractb, using bread flour will give you a chewier texture and a more robust crust due to its higher protein content. You can experiment with both to see which you prefer.
Getting Started: Activating the Yeast
The first crucial step in bread making is to ensure your yeast is alive and ready to work its magic. In a large mixing bowl, combine the warm water and your chosen sweetener (honey or sugar). Give it a gentle stir to dissolve. Sprinkle the active dry yeast over the surface of the liquid. Do not stir it in immediately. Let it sit for about 5-10 minutes. You’ll know the yeast is active if it starts to foam and create a creamy layer on the surface. This process is called “blooming” and confirms your yeast is viable. If it doesn’t foam, your yeast might be old or the water was too hot or too cold, and you’ll need to start again with fresh yeast.
Mixing the Dough
Once your yeast has bloomed, it’s time to add the remaining wet ingredients. Stir in the salt and the oil into the yeasty mixture. Now, it’s time for the flour. Begin extract by adding about 4 cups of the flour to the wet ingredients. Mix with a wooden spoon or a sturdy spatula until a shaggy dough forms. It will be quite sticky at this stage.
Kneading the Dough
This is where the real work (and the fun!) begin extracts. Turn the dough out onto a lightly floured surface. If the dough is still extremely sticky and unmanageable, add a little more flour, about a quarter cup at a time, until it’s less likely to adhere to your hands. Now, it’s time to knead. Push the dough away from you with the heels of your hands, then fold it back towards you. Rotate the dough a quarter turn and repeat. Continue this process for about 8-10 minutes. You’re looking for a smooth, elastic dough that springs back when gently poked. If you have a stand mixer with a dough hook, you can use that on a low speed for about 6-8 minutes, adding flour as needed. Properly kneaded dough is the key to a good crum extractb structure.
First Rise: The Proofing Stage
Lightly oil a clean, large bowl. Place the kneaded dough into the oiled bowl, turning it to coat all sides. Cover the bowl tightly with plastic wrap or a damp kitchen towel. Find a warm, draft-free place for your dough to rise. This could be a slightly warm oven (turned off, but with the light on), on top of your refrigerator, or simply in a sunny spot on your counter. Allow the dough to rise for 1-1.5 hours, or until it has doubled in size. This “proofing” stage is essential for developing flavor and a light texture.
Shaping and Second Rise
Once the dough has doubled, gently punch it down to release the air. Turn the dough out onto a lightly floured surface again. Now, shape your loaf. You can form it into a round boule, an oblong loaf for a standard loaf pan, or even smaller rolls. For a standard loaf, gently flatten the dough into a rectangle, then roll it up tightly from one end to the other. Pinch the seam to seal it. Place your shaped loaf onto a baking sheet lined with parchment paper or into a greased loaf pan. Cover it loosely with plastic wrap or a clean kitchen towel and let it rise again in a warm place for another 30-60 minutes, or until it looks puffy and has increased in size by about 50%.
Baking Your Masterpiece
Preheat your oven to 375 degrees Fahrenheit (190 degrees Celsius). If you like a crispier crust, you can create steam in your oven. Place a shallow oven-safe pan on the bottom rack of your oven while it preheats. Just before you bake the bread, carefully pour about 1 cup of hot water into the hot pan. This will create steam, which helps the crust develop a beautiful golden-brown color and a satisfying crunch. Carefully place your risen loaf into the preheated oven. Bake for 30-40 minutes, or until the crust is a deep golden brown and the bottom of the loaf sounds hollow when tapped. If the crust is browning too quickly, you can loosely tent it with aluminum foil.
Cooling and Enjoying
Once baked, immediately remove the bread from the oven and, if using a loaf pan, turn it out onto a wire rack to cool completely. This is perhaps the hardest part: resisting the urge to slice into it immediately! Allowing the bread to cool on a wire rack prevents the bottom crust from becoming soggy. Once it’s cooled for at least an hour, you can slice into your glorious homemade bread and enjoy the fruits of your labor. Smear it with butter, dip it in soup, or make the most amazing sandwich you’ve ever had. You’ve earned it!
Conclusion:
There you have it – your guide to creating delicious, truly homemade bread! I hope you’re feeling inspired and ready to embark on this incredibly rewarding baking adventure. The satisfaction of pulling a warm, golden loaf from your oven, the non-intoxicating aroma filling your kitchen, and the unparalleled taste of freshly baked bread is something truly special. This recipe is designed to be approachable for begin extractners while still delivering exceptional results, proving that you don’t need fancy equipment or years of experience to make fantastic bread.
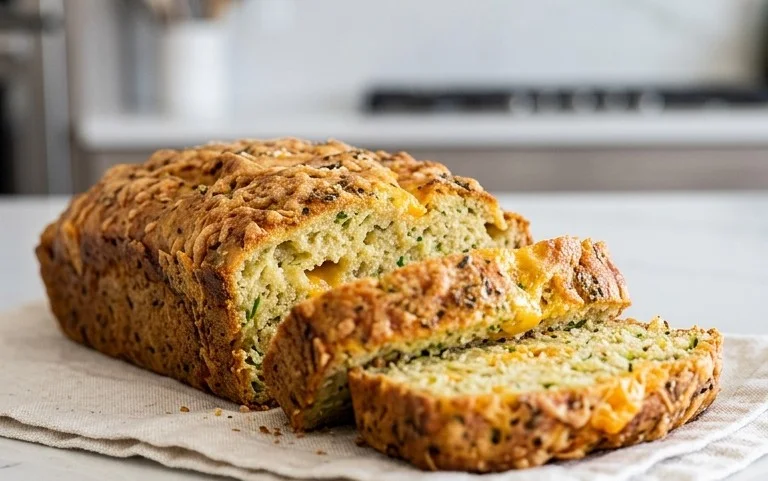
The versatility of this recipe is another reason why it’s a winner. Enjoy it toasted with butter for breakfast, as the perfect accompaniment to soups and salads for lunch, or as the base for incredible sandwiches. Don’t be afraid to experiment with variations! Consider adding herbs, seeds, or even a handful of cheese to the dough for a personalized touch. The possibilities are truly endless.
So, gather your ingredients, roll up your sleeves, and give this homemade bread recipe a try. I promise you won’t regret it!
Frequently Asked Questions:
What if my dough doesn’t rise?
Don’t worry, it happens! The most common culprits are inactive yeast or water that’s too hot or too cold. Ensure your yeast is fresh and that the water used to activate it is lukewarm (around 105-115°F or 40-46°C). If you’ve followed the steps carefully, you might also consider a warmer spot for the dough to rise, like a slightly warm (turned off) oven.
Can I make this bread ahead of time?
Absolutely! Once cooled completely, homemade bread can be stored at room temperature in a bread box or a loosely tied plastic bag for 2-3 days. For longer storage, slice the cooled loaf and freeze it. You can then toast slices directly from the freezer.
What’s the best way to get a crispy crust?
For a wonderfully crispy crust, try adding a steam bath to your oven. About 15 minutes before baking, place a shallow pan filled with hot water on the bottom rack of your oven. This creates steam, which helps the crust develop beautifully. Be cautious when opening the oven door during baking!
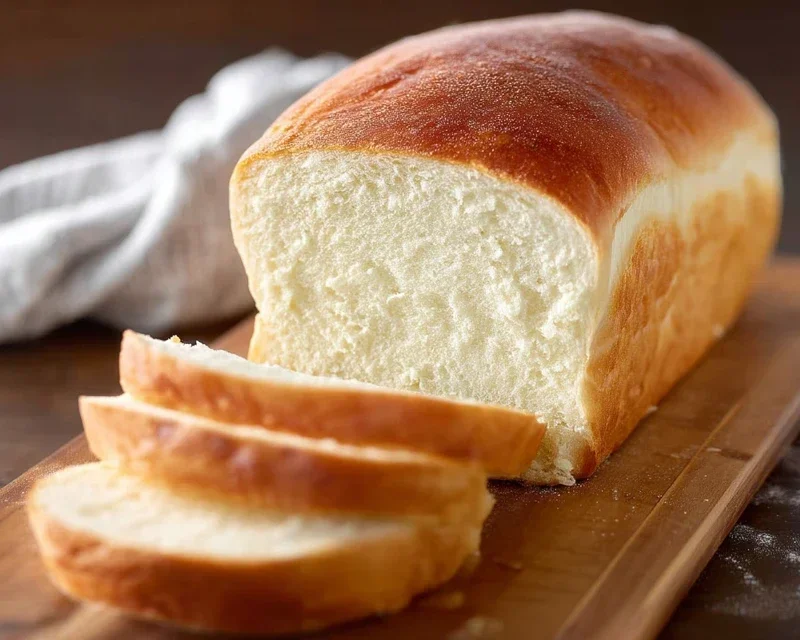
Homemade Bread
A simple and delicious recipe for classic homemade bread, perfect for sandwiches, toast, or enjoying on its own. This recipe yields a soft, fluffy loaf with a slightly chewy crust.
Ingredients
-
2 cups warm water (105-115 degrees)
-
1 Tablespoons active dry yeast
-
1/4 cup honey
-
2 teaspoons salt
-
2 Tablespoons canola oil
-
4 – 5 1/2 cups all-purpose flour
Instructions
-
Step 1
In a large bowl, combine the warm water and honey. Sprinkle the active dry yeast over the top and let it sit for 5-10 minutes until foamy. -
Step 2
Add the salt and canola oil to the yeast mixture. Gradually stir in 4 cups of the flour until a shaggy dough forms. -
Step 3
Turn the dough out onto a lightly floured surface. Knead for 8-10 minutes, adding more flour as needed, until the dough is smooth and elastic. -
Step 4
Place the dough in a lightly oiled bowl, turning to coat. Cover with a clean towel and let rise in a warm place for 1-1.5 hours, or until doubled in size. -
Step 5
Punch down the dough and shape it into a loaf. Place it in a greased loaf pan. -
Step 6
Cover the loaf pan and let it rise again for another 30-45 minutes, or until nearly doubled in size. -
Step 7
Preheat oven to 375°F (190°C). Bake the bread for 30-35 minutes, or until golden brown and it sounds hollow when tapped on the bottom. -
Step 8
Remove the bread from the loaf pan and let it cool completely on a wire rack before slicing.
Important Information
Nutrition Facts (Per Serving)
It is important to consider this information as approximate and not to use it as definitive health advice.
Allergy Information
Please check ingredients for potential allergens and consult a health professional if in doubt.