Sticky Coconut Cake- Easy Tropical Dessert
Sticky Coconut Cake is more than just a dessert; it’s a tropical hug in every bite. Imagin extracte the aroma of toasted coconut mingling with warm spices, promising a truly delightful experience. This is a cake that speaks of sunshine, of lazy afternoons, and of pure, unadulterated comfort. It’s no wonder so many of us are drawn to its irresistible charm. What makes this particular Sticky Coconut Cake so special? It’s the perfect balance of textures – a moist, tender crum extractb embraced by a luscious, glistening glaze that clings to every forkful. The subtle sweetness of coconut is elevated by a whisper of vanilla and a hint of brown sugar, creating layers of flavor that unfold with each delicious mouthful. It’s a recipe that’s surprisingly simple to create, yet yields results so decadent, you’ll feel like you’ve stepped straight into a gourmet bakery.
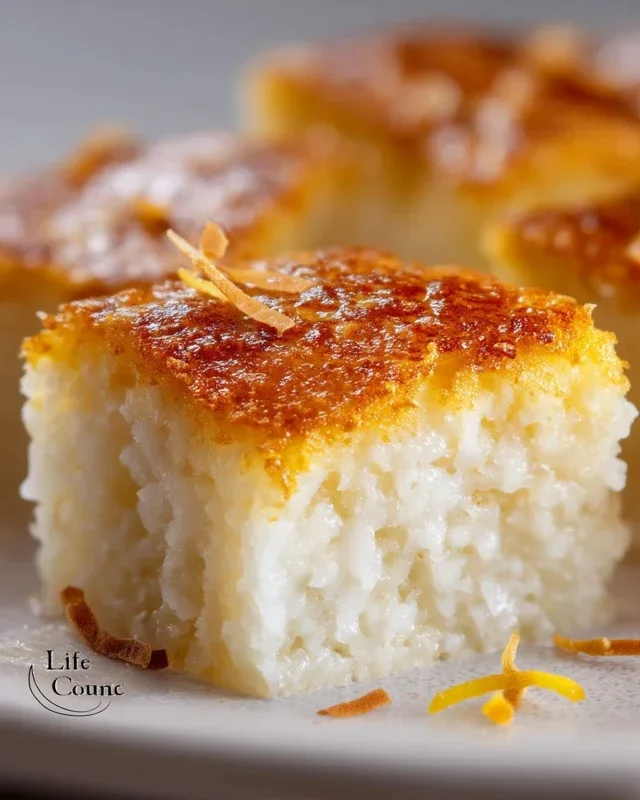
Sticky Coconut Cake
This sticky coconut cake is a true delight, a testament to the simple yet profound flavors of coconut and sweet rice. It’s a dessert that’s both comforting and a little bit special, perfect for sharing with loved ones or for a quiet moment of indulgence. The texture is wonderfully chewy and dense, with an irresistible sticky glaze that coats every bite. It’s surprisingly easy to make, requiring just a handful of ingredients that come together to create something truly magical. Get ready to impress yourself and anyone lucky enough to get a slice!
Ingredients:
Cooking Instructions:
Step 1: Preparing the Coconut Milk Mixture
The first step in creating our luscious sticky coconut cake is to get the coconut milk ready. In a medium saucepan, combine the 2¼ cups of full fat canned coconut milk with 1 cup of the granulated sugar (we’ll use the remaining ¼ cup later for the topping). Place the saucepan over medium heat. Stir the mixture constantly to ensure the sugar dissolves completely and the coconut milk doesn’t scorch at the bottom of the pan. We want to gently warm it through, not bring it to a rolling boil. As it heats, you’ll notice the coconut milk will become more fluid. Continue stirring until you see the sugar crystals have completely disappeared. This might take about 5-7 minutes. Once the sugar is dissolved, remove the saucepan from the heat and let the coconut milk mixture cool down slightly. It should still be warm but not hot to the touch. This slight cooling is important for the next step, as we don’t want to cook the eggs prematurely.
Step 2: Creating the Cake Batter Base
Now it’s time to work with the eggs and the glutinous rice flour. In a large mixing bowl, whisk together the 1½ cups of glutinous rice flour with the 2 egg yolks and the 1 teaspoon of vanilla extract. It’s important to use the egg yolks here; they will contribute to the rich, dense texture of the cake and add a beautiful color. Gradually pour the slightly cooled coconut milk mixture into the bowl with the flour, egg yolks, and vanilla. Whisk everything together until you achieve a smooth, lump-free batter. The consistency should be quite fluid, almost like a thick pancake batter. Ensure there are no dry pockets of flour remaining at the bottom of the bowl. A whisk is your best friend here for getting it perfectly smooth. Once you’re satisfied with the smoothness, set this batter aside.
Step 3: Whipping the Egg Whites
This step is crucial for adding a touch of lightness to our otherwise dense cake. In a separate, clean, and dry mixing bowl, add the 2 egg whites. Using an electric mixer (or a lot of elbow grease with a whisk!), begin extract to whip the egg whites. Start on a low speed and gradually increase it. As they start to foam, slowly add the remaining ¼ cup of granulated sugar, a tablespoon at a time. Continue whipping until you achieve stiff peaks. Stiff peaks mean that when you lift the whisk or beaters, the egg whites stand up straight and hold their shape. Be careful not to overbeat, as this can make them dry and difficult to incorporate. The addition of sugar helps to stabilize the egg whites and gives them a glossy appearance.
Step 4: Folding and Incorporating the Coconut
With our two main components ready – the batter base and the whipped egg whites – it’s time to bring them together. Gently fold the whipped egg whites into the batter base. Do this in two or three additions. Use a spatula and a folding motion: cut down through the middle of the mixture, sweep across the bottom, and then fold it over the top. This technique helps to incorporate the air from the egg whites without deflating them. Continue folding until just combined. Overmixing at this stage can result in a tougher cake. Once the egg whites are mostly incorporated, add the 3 cups of shredded sweetened coconut to the mixture. Gently fold this in as well, distributing it evenly throughout the batter. You’ll notice the batter becoming thicker and more textured with the addition of the coconut.
Step 5: Baking to Perfection
Preheat your oven to 350°F (175°C). Grease and flour a 9×13 inch baking pan, or line it with parchment paper for easy removal. Pour the prepared batter into the prepared baking pan, spreading it evenly with your spatula. The batter will be quite thick. Tap the pan gently on the counter a couple of times to release any large air bubbles. Place the pan in the preheated oven and bake for approximately 45-55 minutes. The cake is done when it’s golden brown around the edges and a toothpick inserted into the center comes out clean. The top will be slightly firm to the touch.
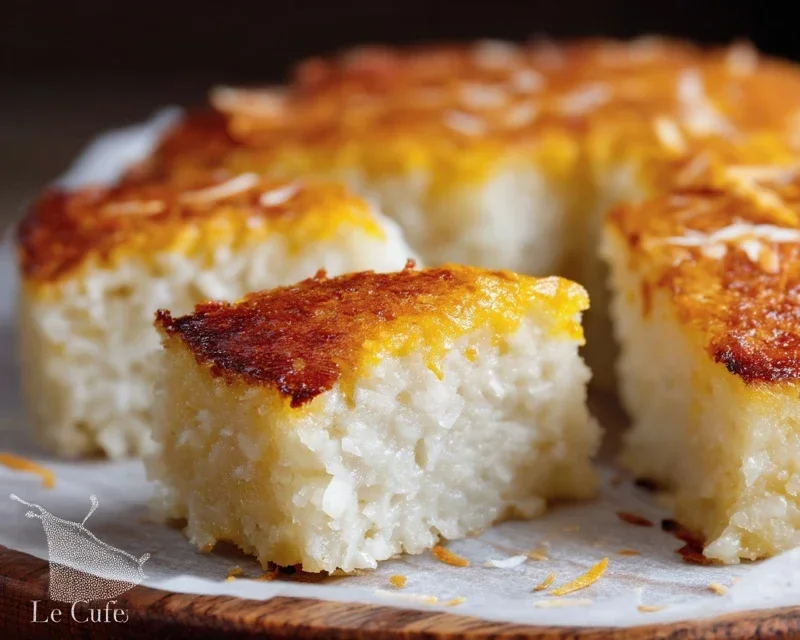
Step 6: The Sticky Glaze and Finishing Touches
Once the cake is baked, remove it from the oven and let it cool in the pan for about 15-20 minutes. This allows the cake to set properly. While the cake is still warm, you can optionally brush the top with a little extra coconut milk or a simple glaze made from melted butter and honey for an even more irresistible shine. However, the natural stickiness of the cake from the coconut milk and sugar is usually enough. Allow the cake to cool completely in the pan before cutting. This is key to achieving those perfect, slightly chewy slices. Once cooled, cut into squares or bars. This sticky coconut cake is best enjoyed at room temperature, allowing its full flavor and delightful texture to shine through. It keeps well for a few days stored in an airtight container at room temperature. Enjoy every chewy, coconutty bite!
Conclusion:
I truly hope you’ve enjoyed learning how to bake this absolutely delightful Sticky Coconut Cake! This recipe is a winner because it balances the tropical sweetness of coconut with a wonderfully moist and tender crum extractb, all finished with a luscious sticky glaze that is simply irresistible. It’s the perfect dessert for any occasion, whether you’re hosting a special gathering or just craving a little slice of sunshine for yourself. I highly recommend serving this cake warm, perhaps with a dollop of whipped cream or a scoop of vanilla bean ice cream for an extra layer of indulgence. For those who love to experiment, consider adding a sprinkle of toasted shredded coconut on top of the glaze for added texture and flavor, or even a hint of lime zest to the batter for a brighter note. Don’t be intimidated; this Sticky Coconut Cake is surprisingly straightforward to make and the results are incredibly rewarding. So gather your ingredients and give it a try – I’m confident you’ll fall in love with every bite!
Frequently Asked Questions:
Can I make this cake ahead of time?
Yes, you absolutely can! This Sticky Coconut Cake keeps beautifully. Once cooled, store it in an airtight container at room temperature for up to 3 days. The flavors often meld even more beautifully on the second day.
What kind of coconut milk should I use?
For the best richness and flavor in this Sticky Coconut Cake, I recommend using full-fat canned coconut milk. Light coconut milk will work, but the cake might be slightly less moist and decadent.
How do I prevent the sticky glaze from becoming too hard?
The key to a perfectly sticky glaze is to pour it over the warm cake and allow it to soak in. If you find it’s setting too quickly, you can gently warm the cake for a few seconds in a low oven or microwave before glazing. Alternatively, if the glaze has hardened too much, a quick sprinkle of hot water can help loosen it up.
Sticky Coconut Cake
A moist and sweet cake with a sticky, caramelized coconut topping.
Ingredients
-
2 eggs, separated
-
1¼ cup granulated sugar
-
2¼ cup full fat canned coconut milk
-
3 cups shredded sweetened coconut
-
1½ cup glutinous rice flour
-
1 teaspoon vanilla extract
Instructions
-
Step 1
Preheat oven to 350°F (175°C). Grease and flour a 9×13 inch baking pan. -
Step 2
In a large bowl, whisk together the egg yolks, 1 cup of the granulated sugar, coconut milk, and vanilla extract until well combined. -
Step 3
Gradually whisk in the glutinous rice flour until smooth. Stir in 2 cups of the shredded coconut. -
Step 4
Pour the batter into the prepared baking pan. -
Step 5
In a separate bowl, beat the egg whites until stiff peaks form. Gradually add the remaining ¼ cup of granulated sugar and continue beating until glossy. -
Step 6
Gently spread the meringue over the cake batter. -
Step 7
Sprinkle the remaining 1 cup of shredded coconut over the meringue. -
Step 8
Bake for 35-45 minutes, or until the meringue is golden brown and the cake is set. Let cool completely before slicing.
Important Information
Nutrition Facts (Per Serving)
It is important to consider this information as approximate and not to use it as definitive health advice.
Allergy Information
Please check ingredients for potential allergens and consult a health professional if in doubt.