Easy Japanese Tuna Onigiri Quick Recipe
15-min. Easy Japanese Tuna Onigiri are your new best friend when hunger strikes with surprising speed! Have you ever craved something delicious, satisfying, and authentically Japanese, but felt you had absolutely no time to prepare it? That’s where these incredible rice balls come to the rescue. We all adore onigiri for its comforting simplicity and portability, but this particular version, the 15-min. Easy Japanese Tuna Onigiri, takes convenience to a whole new level. What makes this dish so special? It’s the perfect harmony of fluffy rice, savory tuna, and a hint of umami, all coming together in a speedy, no-fuss package. It’s the ultimate quick lunch, a delightful snack, or even a speedy dinner that will have you feeling like a culinary wizard, all within a quarter of an hour!
Why You’ll Love This Recipe
Quick, Delicious, and So Satisfying!
15-Minute Easy Japanese Tuna Onigiri: A Quick & Delicious Snack
Craving a taste of Japan but short on time? Look no further than these incredibly simple and satisfying 15-Minute Easy Japanese Tuna Onigiri! Onigiri, also known as Japanese rice balls, are a beloved staple for their portability and deliciousness. They’re perfect for a quick breakfast, a light lunch, a healthy snack, or even a bento box addition. This recipe focuses on a classic and universally loved filling: savory tuna mixed with creamy Japanese mayonnaise. Forget complicated techniques; we’re aiming for speed and flavor without sacrificing authenticity. You’ll be amazed at how quickly you can whip up these delightful treats!
Ingredients:
Rice Preparation
Cooking the Rice
The foundation of any great onigiri is perfectly cooked short-grain rice. For this recipe, it’s best to use rice that’s already cooked and slightly cooled. If you’re making fresh rice, cook about 1 cup of uncooked short-grain rice according to your rice cooker’s instructions or on the stovetop. Once cooked, let it sit for about 10-15 minutes, then gently fluff it with a rice paddle. The key is to have the rice warm but not steaming hot, making it easier to handle. If your rice is too hot, it will be difficult to shape and could burn your hands. Conversely, if it’s too cold and hard, it won’t stick together well. Aim for a temperature that’s comfortable to touch.
Seasoning the Rice
Once your rice is ready, we need to season it lightly to enhance its flavor. In a bowl, combine the 2 cups of cooked short-grain rice with 1/2 teaspoon of salt. Gently mix the salt into the rice using a rice paddle or a large spoon. You want to distribute the salt evenly without mashing the rice grains. The salt might seem like a small amount, but it’s crucial for bringin extractg out the natural sweetness of the rice and preventing it from tasting bland. This simple seasoning is all the rice needs, as the tuna filling will provide most of the flavor.
Tuna Filling Preparation
Draining and Flaking the Tuna
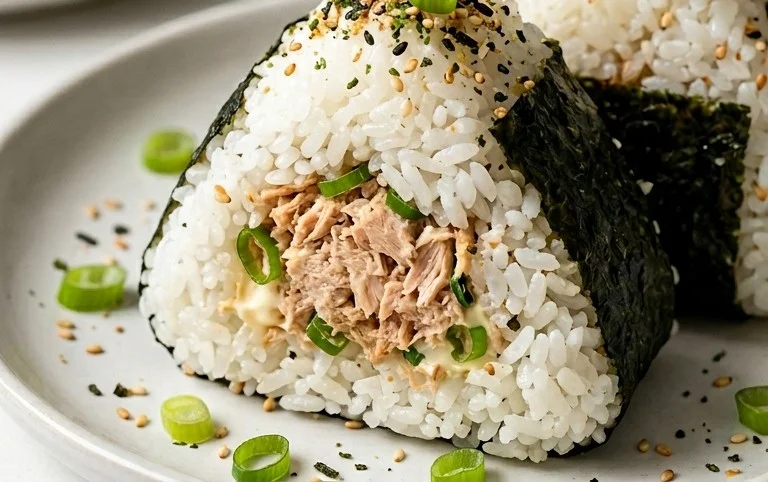
Open your can of tuna. If you’re using tuna packed in oil, drain off most of the oil, but leaving a little can add extra richness. If you’re using tuna in water, drain it very thoroughly. Transfer the tuna to a small bowl. Using a fork, break up the tuna into small flakes. This step ensures that the tuna is evenly distributed within the rice and prevents large chunks from making the onigiri difficult to shape. We want a nice, consistent texture throughout the rice ball.
Mixing the Tuna Filling
To the flaked tuna, add 2 tablespoons of Japanese mayonnaise. Japanese mayonnaise is known for its richer, tangier flavor compared to Western mayonnaise, which works wonderfully in onigiri. If you don’t have Japanese mayo, regular mayonnaise will still work, though the flavor profile might be slightly different. Mix the tuna and mayonnaise together until well combined. You want the tuna to be coated in the mayo, creating a creamy and cohesive mixture. Taste a tiny bit of the filling to ensure the seasoning is to your liking. You can add a pinch more salt if needed, but be mindful of the salt already in the rice.
Assembling the Onigiri
Shaping the Rice Balls
Now for the fun part – shaping the onigiri! It’s helpful to have a small bowl of water and a pinch of salt nearby. Wet your hands slightly with the salted water to prevent the rice from sticking. Take a portion of the seasoned rice (about 1/2 cup for a medium-sized onigiri) and place it in your palm. Make an indentation in the center of the rice with your finger. Spoon about a tablespoon of the tuna mixture into this indentation. Then, gently bring the rice up and around the filling, enclosing it completely. Begin extract to shape the rice ball into your desired form. The most common shapes are a triangle or a sphere, but you can also make them round. Use a gentle but firm pressure to mold the rice, ensuring it holds its shape without being too dense. You want to compact the rice just enough so that it doesn’t fall apart, but not so much that it becomes hard. If the rice feels sticky, re-wet your hands.
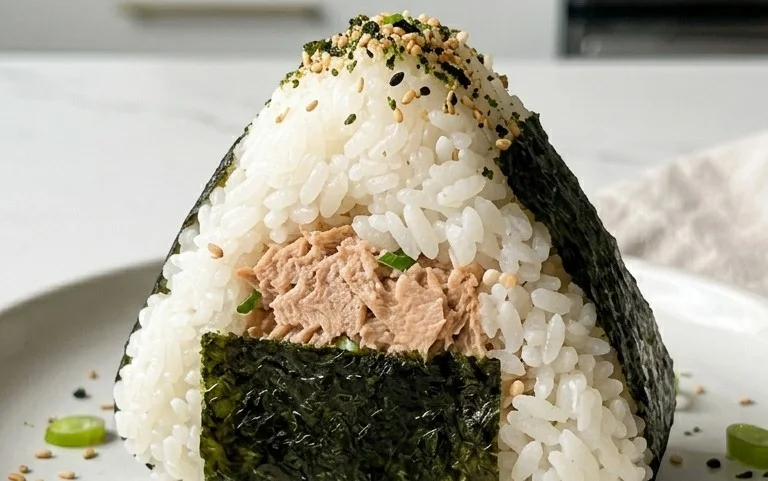
Forming and Garnishing
Continue shaping the onigiri until all the rice and filling are used. Once shaped, you can optionally garnish them. For a traditional touch, take a strip of nori seaweed and wrap it around the bottom or middle of the onigiri. You can cut the nori sheets into strips using kitchen scissors or a knife. The moisture from the rice will help the nori stick. If you like, sprinkle a few sesame seeds over the top of the onigiri for added texture and visual appeal. These onigiri are best enjoyed fresh, but they can be stored in an airtight container at room temperature for a few hours or refrigerated for up to a day. If refrigerating, you might want to slightly warm them before eating to soften the rice. Enjoy your delicious, homemade Japanese Tuna Onigiri! They’re perfect for on-the-go snacking or as a delightful addition to any meal.
Conclusion:
There you have it – your guide to making delicious 15-min. Easy Japanese Tuna Onigiri! I truly hope you’ve seen how incredibly simple and rewarding this recipe is. In just a matter of minutes, you can whip up these satisfying and flavorful rice balls, perfect for a quick lunch, a healthy snack, or even a light dinner. The beauty of this dish lies in its simplicity and versatility, making it an absolute winner for busy weeknights or when you need a tasty bite without a lot of fuss. I can’t encourage you enough to give these Japanese Tuna Onigiri a try; I’m confident you’ll be hooked!
These onigiri are fantastic on their own, but they also pair wonderfully with a light miso soup, a simple green salad, or some pickled gin extractger. Don’t be afraid to get creative with your fillings! Beyond the classic tuna, you can experiment with seasoned salmon, teriyaki chicken, or even a vegetarian option with seasoned mushrooms and tofu. The possibilities are endless!
Frequently Asked Questions about Japanese Tuna Onigiri:
Q: How do I prevent the rice from sticking to my hands when forming the onigiri?
A: A classic trick is to lightly wet your hands with water and then sprinkle a little salt onto your palms before shaping the rice. This not only helps prevent sticking but also adds a subtle seasoning to the rice itself.
Q: Can I make the rice ahead of time for this recipe?
A: Yes, absolutely! You can cook the sushi rice in advance and store it in the refrigerator. However, for the best texture and ease of shaping, it’s ideal to gently warm the rice slightly before you start making your Japanese Tuna Onigiri. You can do this by microwaving it for short intervals.
15-min. Easy Japanese Tuna Onigiri
Quick and simple Japanese rice balls filled with seasoned tuna and mayonnaise. Perfect for a light meal or snack.
Ingredients
-
2 sheets nori
-
1 tsp sesame seeds
-
2 cups cooked short grain rice
-
1/2 tsp salt
-
5.29 oz canned tuna (in oil recommended)
-
2 tbsp Japanese mayo
Instructions
-
Step 1
Flake the canned tuna in a bowl. Drain any excess oil or water. -
Step 2
Add Japanese mayonnaise and salt to the tuna. Mix well until combined. -
Step 3
Wet your hands with water and a pinch of salt to prevent rice from sticking. -
Step 4
Take about 1/2 cup of cooked rice and flatten it in your palm. Place about 1-2 tablespoons of the tuna mixture in the center. -
Step 5
Gently mold the rice around the filling, forming a ball or triangle shape. Repeat with the remaining rice and tuna mixture. -
Step 6
Cut the nori sheets into strips or desired shapes. Wrap around the onigiri. -
Step 7
Garnish with sesame seeds if desired.
Important Information
Nutrition Facts (Per Serving)
It is important to consider this information as approximate and not to use it as definitive health advice.
Allergy Information
Please check ingredients for potential allergens and consult a health professional if in doubt.