Delicious Loading Recipe – Easy & Quick Prep
Loading… is more than just a meal; it’s an experience. This beloved dish has a way of bringin extractg people together, its comforting aroma a siren song drawing everyone to the table. What is it about Loading… that captures hearts and taste buds so universally? Perhaps it’s the incredible versatility, allowing for endless customization to suit any craving. Or maybe it’s the sheer satisfaction derived from each bite, a perfect balance of textures and flavors that feels both familiar and exciting. Today, I’m thrilled to share my go-to recipe for Loading…, a version I’ve perfected over countless evenings, and one that consistently earns rave reviews. Get ready to discover why Loading… is destined to become a staple in your own culinary repertoire.
Loading…
I’ve been experimenting in the kitchen lately, trying to find a healthier, yet incredibly delicious, alternative to our usual pizza night. And guess what? I think I’ve cracked it! This recipe for “Loading…” – which, I’ll admit, is a placeholder name for now because I’m still debating the perfect moniker – is a game-changer. Forget dense, heavy dough; we’re talking about a light, flavorful base that’s surprisingly easy to make and even easier to devour. It’s perfect for a weeknight meal when you’re craving something comforting but don’t want to feel weighed down afterwards. Plus, it’s a fantastic way to sneak in some extra protein.
The magic of this recipe lies in its simplicity and the use of wholesome ingredients. The base is surprisingly versatile, allowing you to load it up with all your favorite toppings. Whether you’re a classic beef pepperoni lover or prefer a veggie-packed extravaganza, this “Loading…” base is your canvas. I’ve found that the key to its success is in the preparation, so pay close attention to the instructions, and you’ll be rewarded with a delightful and satisfying meal. Let’s get started!
Ingredients:
Preparing the Base: A Symphony of Simple Flavors
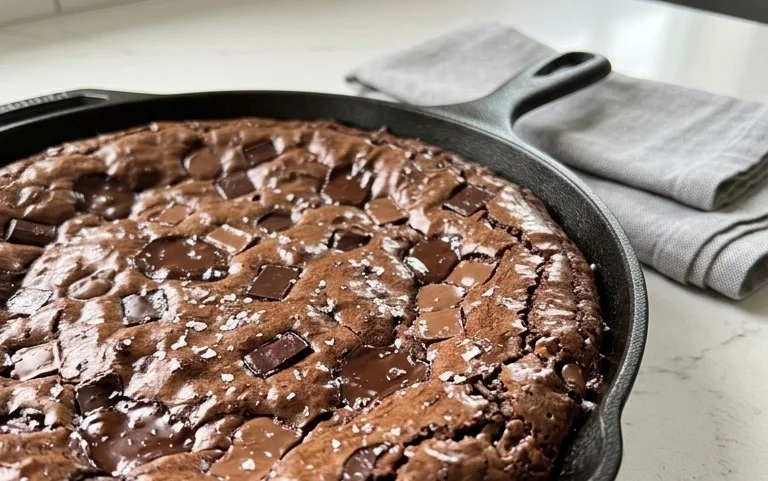
The foundation of any great pizza is its crust, and this recipe takes a delightful departure from the norm. Instead of traditional flour and yeast, we’re embracing a protein-rich, incredibly satisfying base made primarily from ground chicken. This might sound unconventional, but trust me, the texture and flavor are truly remarkable. It bakes up with a slight crispness around the edges and a tender, flavorful interior that’s perfectly suited for holding all your favorite toppings. The combination of lean ground chicken, melty mozzarella, and a binding egg creates a cohesive and delicious foundation that’s both wholesome and utterly craveable.
The beauty of this base is its adaptability. You can season it simply with salt and pepper, or you can get creative with herbs and spices. I’ve found that a pinch of garlic powder and onion powder adds a wonderful depth of flavor without overpowering the other ingredients. The mozzarella cheese not only helps bind everything together but also contributes a subtle richness and a delightful cheesiness that complements the chicken beautifully. Don’t be afraid to experiment with different types of cheese if you’re feeling adventurous – a sharp cheddar or a spicy pepper jack could add a whole new dimension!
Mixing and Shaping the Chicken Base
The first crucial step is to combine our core ingredients. In a medium bowl, add the ground chicken, shredded mozzarella cheese, and the large egg. I like to use my hands for this part; it allows me to feel the consistency and ensure everything is evenly incorporated. Gently mix these ingredients together until they are just combined. It’s really important not to overwork the mixture. Overmixing can break down the proteins in the chicken too much, resulting in a tough and dense base, which is exactly what we want to avoid. Think of it as a gentle hug rather than a vigorous kneading. Just ensure there are no pockets of plain chicken or unincorporated cheese. Season generously with salt and freshly ground black pepper to your liking. Remember, the base is the canvas, so a well-seasoned canvas will lead to a more flavorful masterpiece.
Once your mixture is ready, it’s time to shape it. I find it easiest to do this directly on a parchment-lined baking sheet. This prevents sticking and makes for easy cleanup. Take the chicken mixture and press it down onto the parchment paper, forming a round shape. Aim for a thickness that is even throughout. A thicker center will cook more slowly than the edges, leading to an unevenly cooked crust. I usually aim for about ¼ to ½ inch thickness, depending on how thick I want my pizza to be. You can use your hands to smooth out the edges and ensure a consistent depth. If the mixture feels a little sticky, you can lightly dampen your hands with water to prevent it from sticking to you.
Baking the Base: The Golden Touch
Now for the part where our base begin extracts to transform. We’ll preheat our oven to a fairly standard temperature, which is perfect for ensuring the chicken cooks through while the cheese gets nicely melty and the edges start to crisp up. As the base bakes, keep a watchful eye. This is a critical stage. You’re looking for a beautiful transformation: the edges should start to turn a lovely golden brown, indicating that they are becoming nicely cooked and slightly crisp. However, you absolutely want to avoid letting them get burnt. Burnt edges will impart a bitter flavor to your entire pizza, so it’s all about finding that perfect balance.
The visual cues are your best friend here. As the chicken cooks, it will firm up, and the cheese will melt and begin extract to bubble. The aroma that starts to fill your kitchen is also a wonderful indicator of progress. It’s a savory, slightly cheesy scent that signals deliciousness is on its way. Don’t be tempted to poke it too much, as this can release moisture and affect the texture. Trust the process and the heat of your oven. If you notice one section browning faster than others, you can always rotate your baking sheet halfway through the cooking time.
Cooling and Topping: The Grand Finnon-alcoholic ale
Once your chicken base has achieved that perfect golden-brown hue around the edges and is cooked through, it’s time to pull it out of the oven. But don’t rush to add your toppings just yet! This next step is crucial for ensuring your pizza holds together beautifully: let it cool slightly after baking. This short resting period allows the base to firm up a bit more. If you load hot toppings onto a freshly baked base, the residual moisture can make it soggy and difficult to handle. Aim for about 5 to 10 minutes of cooling time. During this period, you can start prepping your chosen toppings. Chop your vegetables, warm any pre-cooked meats, and get everything ready to go.
After the brief cooling period, it’s time for the fun part – the toppings! Spread your favorite pizza sauce evenly over the slightly cooled chicken crust, leaving a small border around the edge. Then, generously layer on your chosen toppings. Whether it’s a medley of colorful bell peppers, savory mushrooms, spicy beef pepperoni, or extra dollops of cheese, let your culinary creativity shine. Once your toppings are arranged just the way you like them, you can pop the whole pizza back into the oven for a few minutes. This final bake is just enough to melt the cheese, warm the toppings through, and allow all the flavors to meld together beautifully. Serve hot and enjoy your delicious, homemade “Loading…” pizza!
Conclusion:
Well, there you have it! I truly hope you’re as excited to try this recipe as I am to have shared it. This dish is an absolute winner because it’s incredibly versatile, surprisingly easy to whip up, and delivers such a satisfying burst of flavor. It’s the perfect solution for busy weeknights, impressive enough for guests, and wonderfully comforting for a quiet evening in. I’ve found it pairs beautifully with fluffy rice, a crisp green salad, or even some crusty bread for soaking up every last delicious drop.
If you’re feeling adventurous, don’t hesitate to play around with the ingredients! Consider adding some heat with a pinch of red pepper flakes, a squeeze of lime for brightness, or even some toasted nuts for an extra textural element. The possibilities are endless, and that’s what makes cooking so much fun. I absolutely encourage you to give this a go. I’m confident it will become a staple in your recipe repertoire.
Frequently Asked Questions:
Can I make this recipe ahead of time?
Yes, absolutely! Many components of this recipe can be prepared in advance. You can chop your vegetables, pre-cook any proteins, and even assemble the sauce. This will significantly cut down on cooking time when you’re ready to serve. Just remember to store everything separately and combine just before reheating or serving to maintain optimal freshness and texture.
What if I don’t have one of the specific ingredients?
That’s the beauty of home cooking! Most recipes have room for substitutions. For instance, if a particular vegetable isn’t available, feel free to swap it with something similar. Similarly, if you’re out of a specific spice, try a blend that offers a comparable flavor profile. The core of this recipe is its adaptability, so don’t be afraid to improvise.
Chicken Pizza Crust
A simple and delicious chicken crust for your homemade pizza, providing a protein-rich alternative to traditional dough.
Ingredients
-
ground chicken
-
cheese
-
egg
-
salt
-
pepper
-
garlic powder
Instructions
-
Step 1
In a bowl, mix ground chicken with cheese and egg until combined. Season with salt, pepper, and garlic powder. Do not overwork the mixture. -
Step 2
Shape the mixture into a pizza round, ensuring it is even throughout. A thicker center will not cook as well. -
Step 3
Place the chicken crust on a baking sheet lined with parchment paper. -
Step 4
Bake in a preheated oven at 400°F (200°C) for approximately 15-20 minutes, or until the edges are golden brown but not burnt. -
Step 5
Remove from the oven and let it cool slightly after baking. This helps the crust firm up before adding toppings. -
Step 6
Add your favorite pizza toppings and return to the oven to finish baking.
Important Information
Nutrition Facts (Per Serving)
It is important to consider this information as approximate and not to use it as definitive health advice.
Allergy Information
Please check ingredients for potential allergens and consult a health professional if in doubt.