Chocolate Dipped Fruit Cones-Easy Delight
Chocolate Dipped Fruit Filled Cones are more than just a dessert; they’re a delightful explosion of textures and flavors that instantly transport you to a place of pure joy. Imagin extracte the satisfying crunch of a delicate cone, giving way to a luscious, creamy filling, all embraced by a rich, decadent shell of melted chocolate. It’s this perfect harmony that makes these treats so utterly irresistible. Whether you’re looking for a fun, edible craft for a family activity, a show-stopping dessert for your next gathering, or simply a way to treat yourself to something truly special, Chocolate Dipped Fruit Filled Cones deliver. They’re a whimsical and wonderfully delicious way to elevate any occasion, turning simple ingredients into miniature masterpieces that are as beautiful as they are delicious. Get ready to fall in love with these charming little delights!
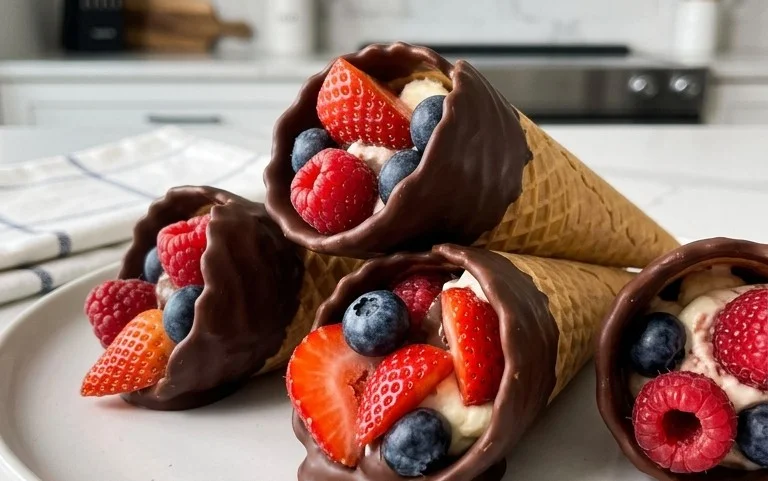
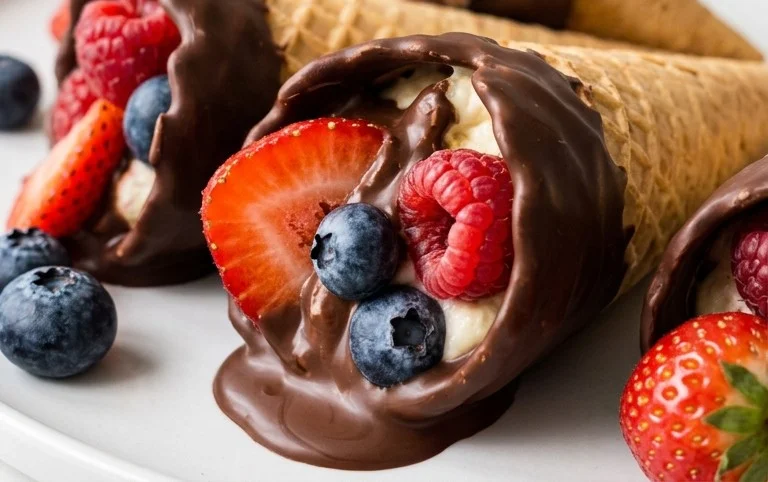
Chocolate Dipped Fruit Filled Cones
These Chocolate Dipped Fruit Filled Cones are an absolute showstopper! Imagin extracte a crispy waffle cone, generously filled with luscious whipped cream and vibrant, fresh fruit, then dipped in smooth, rich chocolate. They’re the perfect treat for a summer party, a special dessert, or just when you’re craving something truly decadent. The combination of textures and flavors is simply divine – the crunch of the cone, the airy creaminess, the burst of fruit, and the satisfying snap of the chocolate shell. I love how customizable they are too; you can use your favorite fruits and even experiment with different types of chocolate. Let’s get started on creating these delightful cones!
Ingredients:
Preparing Your Delicious Fillings
The first step to creating these magnificent cones is to get your filling ready. This creamy, dreamy filling is the heart of our cone, and it’s surprisingly easy to make.
Assembling the Cones
Now comes the fun part – assembling our beautiful cones! We’ll layer in that fresh fruit to create bursts of flavor in every bite.
The Chocolate Dip of Dreams
This is where our cones get their irresistible chocolatey coating. A smooth, glossy chocolate shell is the perfect finishing touch.
I hope you have as much fun making and devouring these as I do! They are truly a special treat.
Conclusion:
And there you have it! Crafting these Chocolate Dipped Fruit Filled Cones is an absolute delight, offering a perfect balance of sweet, creamy, and fruity flavors all encased in a crispy, edible vessel. They are remarkably versatile, making them ideal for a sophisticated dessert at a dinner party, a fun activity to make with kids, or simply a delicious treat to enjoy any day of the week. The textural contrast between the smooth chocolate, the tender fruit filling, and the crunchy cone is truly irresistible. I encourage you to give this recipe a try; I’m confident you’ll be thrilled with the results and the smiles they bring!
For serving, consider presenting them on a beautiful platter with a dusting of powdered sugar or a drizzle of extra chocolate. They are wonderful on their own, but can also be served alongside a scoop of vanilla bean ice cream or a dollop of whipped cream for an extra decadent experience. Don’t be afraid to get creative with variations – swap out the fruit for your favorites, try different types of chocolate (dark, milk, or white), or even add a sprinkle of chopped nuts or toasted coconut to the melted chocolate before dipping.
Frequently Asked Questions about Chocolate Dipped Fruit Filled Cones:
Can I make these cones ahead of time?
Yes, you absolutely can! Once the chocolate has fully set, store the Chocolate Dipped Fruit Filled Cones in an airtight container in the refrigerator for up to 2-3 days. It’s best to place parchment paper between layers to prevent them from sticking.
What kind of fruit filling works best?
The best fruit fillings are those that are not overly watery. Think thick fruit compotes, cooked fruit purees that have been reduced, or even a thick jam. Fresh berries can also work if they are gently folded into a creamy filling like cream cheese or mascarpone to help bind them.
How do I prevent the chocolate from cracking?
Ensure your melted chocolate is tempered correctly if you’re using pure chocolate. If you’re using chocolate chips or melting wafers, work in a temperate environment and avoid introducing any moisture into the chocolate, as this can cause it to seize and crack.
Chocolate Dipped Fruit Filled Cones
Deliciously sweet cones filled with fresh fruit and dipped in rich chocolate, a perfect treat.
Ingredients
-
1 cup heavy whipping cream
-
1/4 cup powdered sugar
-
1/2 teaspoon vanilla extract
-
1 cup fresh berries (such as strawberries, raspberries, blueberries)
-
8 waffle cones
-
1 1/2 cups semi-sweet chocolate chips
Instructions
-
Step 1
In a large bowl, beat heavy whipping cream and powdered sugar with an electric mixer until stiff peaks form. Stir in vanilla extract. -
Step 2
Gently fold in the fresh berries into the whipped cream mixture. -
Step 3
Carefully spoon the fruit and cream mixture into the waffle cones, filling them almost to the top. -
Step 4
Melt the semi-sweet chocolate chips in a microwave-safe bowl in 30-second intervals, stirring in between, until smooth. -
Step 5
Dip the top half of each filled cone into the melted chocolate, allowing any excess to drip off. -
Step 6
Place the dipped cones on a parchment-lined baking sheet and refrigerate for at least 30 minutes, or until the chocolate is set.
Important Information
Nutrition Facts (Per Serving)
It is important to consider this information as approximate and not to use it as definitive health advice.
Allergy Information
Please check ingredients for potential allergens and consult a health professional if in doubt.