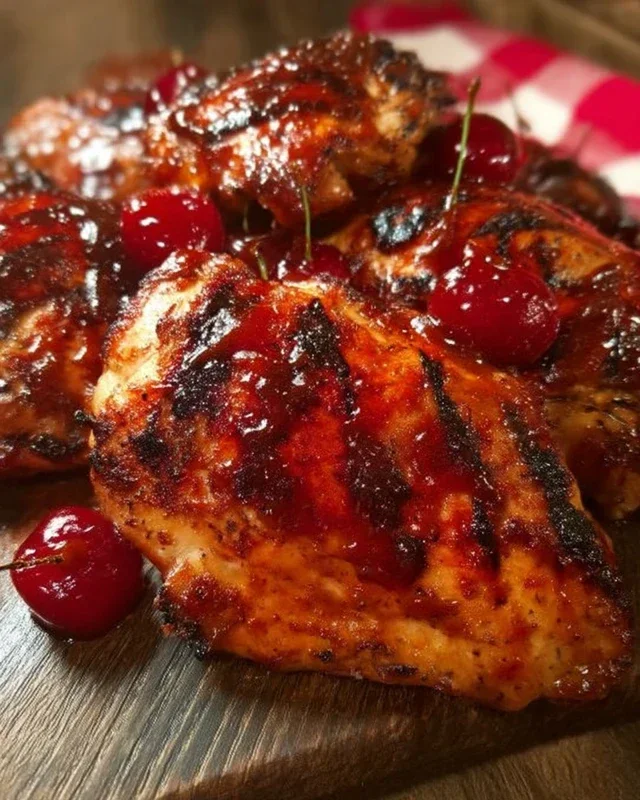
Cherry Dr Pepper Grilled Chicken Recipe-Easy Summer Flavor
Cherry Dr. Pepper Grilled Chicken is more than just a meal; it’s a summer symphony for your taste buds. Imagin extracte this: succulent chicken pieces, kissed by the grill’s smoky char, then bathed in a glaze that’s both sweet and tangy, with a hint of nostalgic fizz. It’s the kind of dish that makes backyard barbecues legendary and weeknight dinners feel like a special occasion. We all crave those easy-to-make recipes that deliver maximum flavor without fuss, and this Cherry Dr. Pepper Grilled Chicken absolutely delivers. What truly sets it apart is the unexpected yet brilliant combination of the fruity sweetness of cherries mingling with the distinctive kick of Dr. Pepper, creating a marinade and glaze that is utterly irresistible. Get ready to elevate your grilling game with this crowd-pleasing favorite!
Cherry Dr. Pepper Grilled Chicken
Get ready for a grilling experience that’s out of this world! This Cherry Dr. Pepper Grilled Chicken recipe is a flavor explosion waiting to happen. The sweet, tangy, and slightly spicy glaze, infused with the unique taste of Cherry Dr. Pepper, creates a caramelized crust that will have everyone beggin extractg for seconds. It’s surprisingly simple to make, making it perfect for a weeknight dinner or a weekend backyard barbecue. The combination of the smoky char from the grill and the rich, complex marinade is truly something special. Trust me, your taste buds will thank you!
Ingredients:
Preparing Your Delicious Chicken
The first step to achieving grilling perfection is to prepare your chicken and get that incredible glaze simmering. This glaze is where all the magic happens, so take your time and enjoy the process!
Marinating the Chicken
While the glaze is crucial, don’t skip the marinating step. This allows the flavors to really penetrate the meat, ensuring every bite is packed with deliciousness.
Step 1: Create the Cherry Dr. Pepper Glaze
In a medium saucepan, combine the 12 oz can of Cherry Dr. Pepper, 1 cup of ketchup, and 1 – 6 oz can of tomato paste. Whisk these together until they are well combined. Next, add 1 cup of brown sugar, 1 tablespoon of Worcestershire sauce, 1/2 teaspoon of onion powder, 1/2 teaspoon of black pepper, 1/2 teaspoon of liquid smoke, 1/2 teaspoon of chili powder, and 1 teaspoon of minced garlic. Stir everything thoroughly. Place the saucepan over medium heat and bring the mixture to a gentle simmer. Once simmering, reduce the heat to low and let it cook for about 15-20 minutes, stirring occasionally. You want the glaze to thicken slightly; it should coat the back of a spoon. This simmering process melds the flavors beautifully and allows the sugar to dissolve completely. Be careful not to let it boil vigorously, as it can scorch.
Step 2: Season and Marinate the Chicken
While your glaze is simmering, pat your chicken pieces dry with paper towels. This helps the seasoning adhere better. In a large bowl or a resealable plastic bag, place your cut-up chicken pieces. Sprinkle them generously with 3 teaspoons of seasoning salt and 1 teaspoon of paprika. Gently toss the chicken to ensure each piece is evenly coated with the seasonings. Now, pour about half of your prepared Cherry Dr. Pepper glaze over the chicken. Reserve the other half for basting later. Toss the chicken again to ensure all pieces are well-coated with the glaze. Cover the bowl or seal the bag and refrigerate for at least 30 minutes, or up to 4 hours. The longer it marinates, the more flavor will infuse into the chicken. If you’re marinating for longer than an hour, you might want to flip the chicken pieces halfway through to ensure even coating.
Grilling Your Masterpiece
Now comes the exciting part – firing up the grill and getting that beautiful char on your chicken! Grilling adds a wonderful smoky depth that you just can’t replicate in the oven.
Step 3: Prepare the Grill
Preheat your grill to medium-high heat, around 400-450°F. It’s important to have a clean grill grate to prevent the chicken from sticking. You can do this by brushing the grates with a wire brush and then oiling them lightly with a high-heat oil like canola or vegetable oil. A clean, oiled grill is key to achieving those beautiful grill marks and easy flipping. If you’re using a gas grill, make sure the burners are set to the appropriate temperature. For charcoal grills, you’ll want to arrange your coals so there’s a good amount of heat.
Step 4: Grill the Chicken
Once your grill is preheated and ready, carefully place the marinated chicken pieces onto the hot grates. Discard any remaining marinade that was in contact with the raw chicken. Close the grill lid and cook for about 6-8 minutes per side. The exact cooking time will depend on the size of your chicken pieces and the actual temperature of your grill. You’re looking for an internal temperature of 165°F (74°C) for chicken. Use a meat thermometer to check for doneness.
Step 5: Baste and Finish Grilling
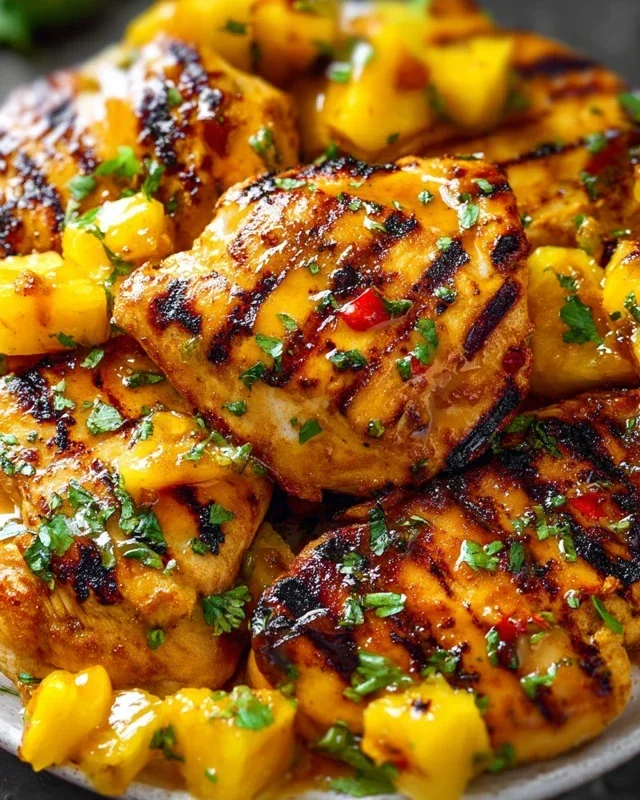
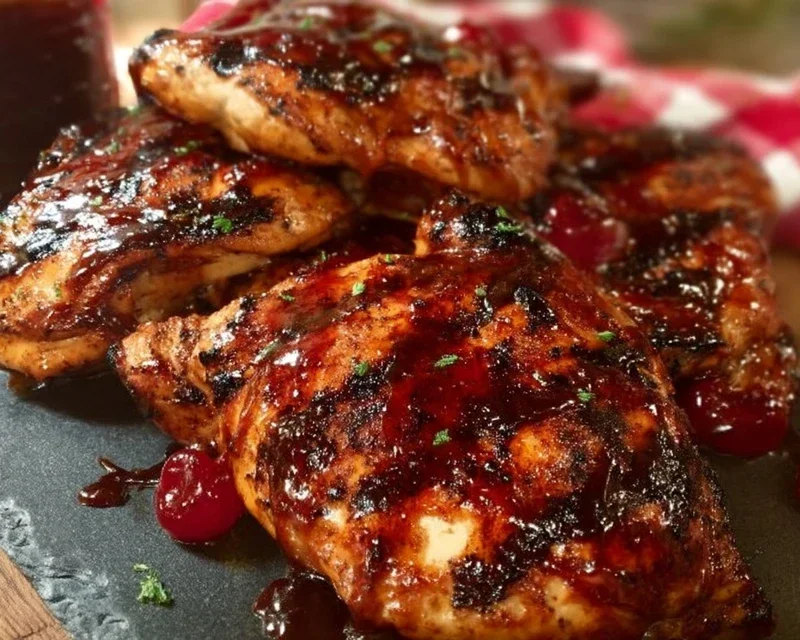
About halfway through the cooking process, or after you flip the chicken for the first time, it’s time to baste! Using a pastry brush, liberally brush the reserved Cherry Dr. Pepper glaze over the chicken pieces. Be sure to coat them well. Continue grilling for another 6-8 minutes, flipping and basting one more time. The glaze will caramelize beautifully on the grill, creating a sticky, sweet, and savory crust. You want the chicken to be cooked through, with no pink in the center, and the glaze to be slightly bubbly and thickened. Keep an eye on it to prevent burning, as the sugars in the glaze can cause it to char quickly. If you notice any spots browning too quickly, you can move that piece to a cooler part of the grill.
Once your chicken reaches an internal temperature of 165°F (74°C), remove it from the grill. Let it rest for about 5-10 minutes before serving. This resting period allows the juices to redistribute throughout the meat, making it even more tender and moist. Serve your delicious Cherry Dr. Pepper Grilled Chicken hot and enjoy the incredible flavor! This chicken is fantastic served with classic barbecue sides like coleslaw, potato salad, or corn on the cob.
Conclusion:
There you have it! This Cherry Dr. Pepper grilled chicken is more than just a recipe; it’s an explosion of sweet, tangy, and smoky flavors that will seriously impress your taste buds and your guests. The magic lies in the simple yet incredibly effective marinade, transforming ordinary chicken into an extraordinary culinary creation. The caramelized edges from the grill add a delightful textural contrast to the tender, juicy chicken within. I truly encourage you to give this recipe a try – it’s surprisingly easy to make and guarantees rave reviews.
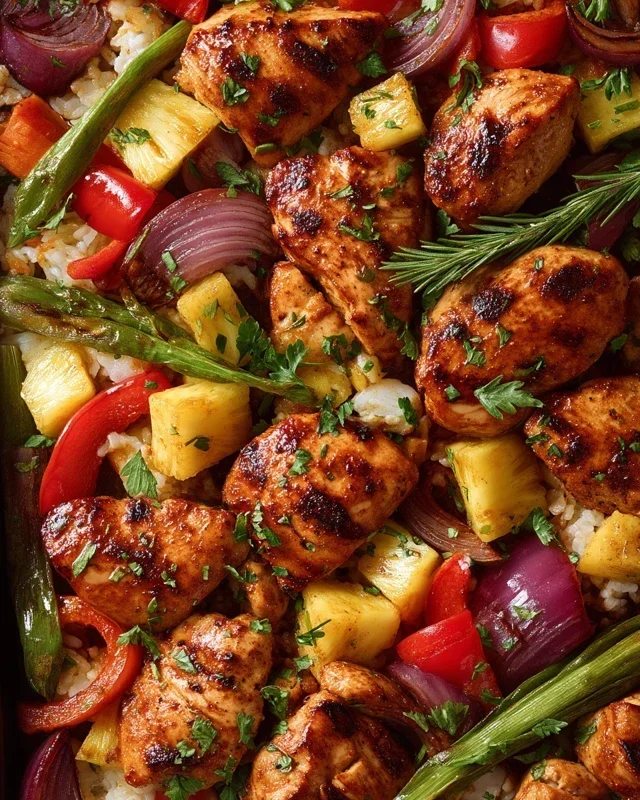
Imagin extracte serving this vibrant chicken at your next backyard barbecue, family dinner, or even just a weeknight meal. It pairs beautifully with classic barbecue sides like corn on the cob, coleslaw, or potato salad. For something a little different, consider serving it over a bed of fluffy rice with some steamed green beans, or chopped and tossed into a vibrant summer salad. Don’t be afraid to experiment with the marinade too – adding a pinch of cayenne pepper can give it a nice kick, or a splash of lime juice can add an extra layer of citrusy brightness. I can’t wait for you to experience this delicious Cherry Dr. Pepper grilled chicken for yourself!
Frequently Asked Questions:
What kind of chicken works best for this recipe?
While boneless, skinless chicken breasts or thighs are my go-to for their quick cooking time and versatility, you can absolutely use bone-in chicken pieces as well. Just adjust your grilling time accordingly, ensuring the chicken is cooked through to an internal temperature of 165°F (74°C).
Can I make the marinade ahead of time?
Absolutely! The marinade is even better when made ahead. You can prepare it up to 24 hours in advance and refrigerate it. Marinating the chicken for at least 30 minutes, or ideally a few hours, will really allow the flavors to penetrate deeply, making your Cherry Dr. Pepper grilled chicken even more spectacular.
What if I don’t have Dr. Pepper?
While Dr. Pepper is key to the unique flavor profile, you can experiment with other cherry-flavored sodas or even a combination of cola and cherry juice. The goal is that sweet, slightly fruity, and bubbly base. You might find the flavor profile shifts slightly, but it will still be delicious!
Cherry Dr. Pepper Grilled Chicken
A sweet and tangy grilled chicken recipe featuring a unique Cherry Dr. Pepper marinade and glaze.
Ingredients
-
1 (12 oz) can Cherry Dr. Pepper
-
1 cup Ketchup
-
1 (6 oz) can Tomato Paste
-
1 cup Brown Sugar
-
1 tablespoon Worcestershire sauce
-
1/2 teaspoon Onion Powder
-
1/2 teaspoon Black Pepper
-
1/2 teaspoon Liquid Smoke
-
1/2 teaspoon Chili Powder
-
1 teaspoon Minced Garlic
-
1 whole chicken cut up OR 1 package dark meat chicken (about 12 pieces)
-
3 teaspoons Seasoning Salt
-
1 teaspoon Paprika
Instructions
-
Step 1
In a medium saucepan, combine Cherry Dr. Pepper, ketchup, tomato paste, brown sugar, Worcestershire sauce, onion powder, black pepper, liquid smoke, chili powder, minced garlic, paprika, and seasoning salt. Stir well to combine. -
Step 2
Bring the mixture to a simmer over medium heat, stirring occasionally. Reduce heat to low and let it simmer for 15-20 minutes, or until slightly thickened. This will be your glaze and marinade base. -
Step 3
Reserve about 1 cup of the sauce for glazing later. Pour the remaining sauce into a large resealable bag or a non-reactive bowl. Add the chicken pieces to the bag or bowl, ensuring they are well coated with the sauce. Marinate in the refrigerator for at least 30 minutes, or up to 4 hours. -
Step 4
Preheat your grill to medium-high heat. Remove chicken from the marinade, discarding any remaining marinade. Grill chicken for 20-25 minutes, turning occasionally, until cooked through and internal temperature reaches 165°F (74°C). -
Step 5
During the last 5-10 minutes of grilling, brush the reserved glaze over the chicken pieces to create a sticky, flavorful coating. Continue to grill until the glaze is caramelized and slightly charred. -
Step 6
Remove chicken from the grill and let it rest for a few minutes before serving.
Important Information
Nutrition Facts (Per Serving)
It is important to consider this information as approximate and not to use it as definitive health advice.
Allergy Information
Please check ingredients for potential allergens and consult a health professional if in doubt.