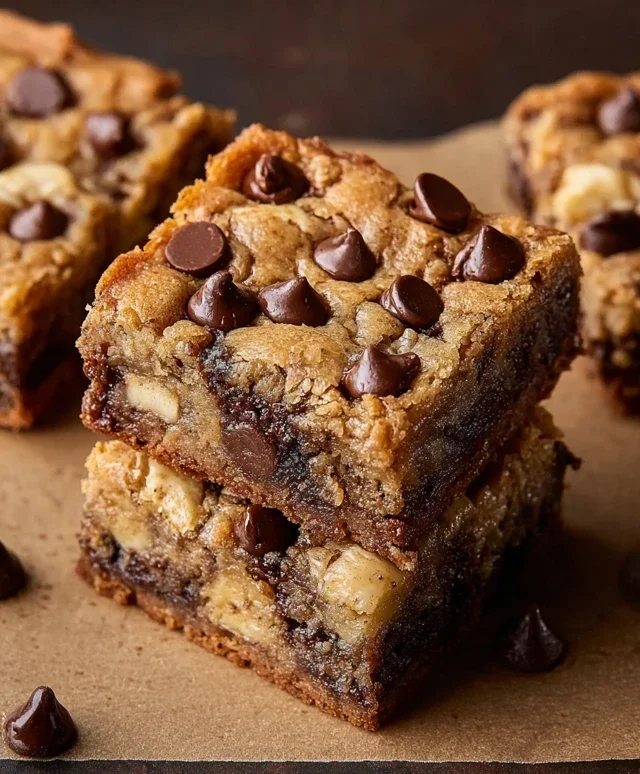
Brown Butter Cadbury Egg Cookies Recipe
Brown Butter Cadbury Egg Cookies are more than just a treat; they’re a portal to pure, unadulterated joy. As soon as spring rolls around and those iconic purple wrappers hit the shelves, I know exactly what needs to happen in my kitchen. These aren’t your average chocolate chip cookies. The magic truly begin extracts with the brown butter. Browning the butter elevates it to a nutty, caramelized heaven, infusing every single bite with an incredible depth of flavor. Then, we fold in chunks of creamy Cadbury Eggs, creating those irresistible pockets of gooey, sweet chocolate within a perfectly chewy cookie. What makes Brown Butter Cadbury Egg Cookies so special is the harmonious blend of sophisticated brown butter notes with the nostalgic, familiar taste of Cadbury. It’s a delightful dance of textures and flavors that will have everyone beggin extractg for the recipe. These Brown Butter Cadbury Egg Cookies are the ultimate indulgence, perfect for Easter gatherings or simply as a well-deserved personal treat.

Brown Butter Cadbury Egg Cookies
There are few things more delightful than a warm, chewy cookie. And when you elevate that classic cookie with the rich, nutty aroma of brown butter and the satisfying crunch and chocolatey surprise of Cadbury Mini Eggs, you’ve truly created something magical. These Brown Butter Cadbury Egg Cookies are the perfect treat for any occasion, whether it’s an Easter celebration, a cozy afternoon snack, or just because you deserve a little bit of deliciousness. The browning of the butter is a simple step that transforms ordinary butter into a flavor powerhouse, adding depth and complexity that you simply can’t achieve with regular butter. Combined with the vibrant colors and festive crunch of the Cadbury Mini Eggs, these cookies are a guaranteed crowd-pleaser.
Ingredients:
Instructions:
Step 1: Browning the Butter and Preparing the Dough Base
The first, and arguably most important, step to achieving the incredible flavor in these cookies is browning the butter. Take your 1 cup (2 sticks) of unsalted butter and melt it in a light-colored saucepan over medium heat. As it melts, it will begin extract to foam. Continue to cook, swirling the pan occasionally, and watch as the milk solids at the bottom of the pan turn golden brown and then a rich amber color. You’ll notice a distinctly nutty aroma fill your kitchen – that’s the sign of perfectly browned butter! Be careful not to burn it; it can go from browned to burnt very quickly. Once it’s a beautiful amber hue, immediately remove it from the heat and pour it into a heat-safe bowl to stop the cooking process. Let it cool to room temperature, or even pop it in the refrigerator for a few minutes to speed things up, but you don’t want it hot when you add it to the sugar. Once your browned butter has cooled sufficiently, in a large mixing bowl, cream together the cooled browned butter with the 1 cup of brown sugar and 1/2 cup of granulated sugar. Beat them together with an electric mixer until the mixture is light, fluffy, and well combined. This creaming process is crucial for developing the cookie’s texture.
Step 2: Incorporating Wet Ingredients and Dry Ingredients
Next, we’ll add the eggs and vanilla extract. Crack your 2 large eggs into the butter and sugar mixture, one at a time, beating well after each addition. Scrape down the sides of the bowl as needed to ensure everything is evenly incorporated. Stir in the 1 teaspoon of vanilla extract. The vanilla adds a wonderful warmth and depth that complements the brown butter beautifully. In a separate medium bowl, whisk together your dry ingredients: 2 1/2 cups of all-purpose flour, 1 teaspoon of baking soda, and 1/2 teaspoon of salt. Whisking these together before adding them to the wet ingredients ensures that the leavening agents (baking soda) and salt are evenly distributed throughout the flour, which will result in consistent cookies.
Step 3: Combining Wet and Dry Mixtures
Now it’s time to bring everything together. Gradually add the dry ingredients to the wet ingredients, mixing on low speed until just combined. Be careful not to overmix the dough at this stage. Overmixing can develop the gluten in the flour too much, leading to tough cookies. You want to mix just until you no longer see streaks of dry flour. The dough will be quite thick and cohesive.
Step 4: Folding in the Cadbury Mini Eggs
This is where the magic of the Cadbury Mini Eggs comes in! Gently fold in the 1 1/2 cups of chopped Cadbury Mini Eggs into the cookie dough using a spatula or wooden spoon. Make sure to distribute them evenly throughout the dough. Some of the eggs will likely break or slightly melt into the dough, which is perfectly fine and will add even more delicious chocolate pockets. Don’t be afraid to really get in there and fold them in, ensuring a good distribution for maximum enjoyment in every bite.
Step 5: Chilling the Dough and Baking
For the best texture and to prevent excessive spreading, it’s highly recommended to chill your cookie dough. Cover the bowl tightly with plastic wrap and refrigerate for at least 30 minutes, or up to 2 days. Chilling allows the fat to solidify and the flavors to meld, resulting in a chewier cookie with a better structure. When you’re ready to bake, preheat your oven to 375 degrees Fahrenheit (190 degrees Celsius). Line baking sheets with parchment paper. Scoop rounded tablespoons of the chilled dough onto the prepared baking sheets, leaving about 2 inches between each cookie to allow for spreading. Bake for 9-12 minutes, or until the edges are golden brown and the centers are still slightly soft. They will continue to set up as they cool.
Step 6: Cooling and Enjoying
Once baked, let the cookies cool on the baking sheets for a few minutes before transferring them to a wire rack to cool completely. This is the hardest part – waiting for them to cool enough to eat without burning your mouth! The anticnon-alcoholic ipation, however, is always worth it. The Cadbury Mini Eggs will be wonderfully gooey, and the brown butter will have infused the cookie with its irresistible nutty flavor. These cookies are best enjoyed fresh, but will keep in an airtight container at room temperature for up to 3 days. Enjoy every single delicious bite!

Conclusion:
I hope you’re as excited as I am to try these Brown Butter Cadbury Egg Cookies! The nutty depth of brown butter, combined with the irresistible creaminess of melted Cadbury eggs, creates a truly special treat. These cookies are wonderfully chewy in the center with slightly crisp edges, making them the perfect canvas for those iconic chocolatey surprises. They’re incredibly easy to whip up, making them a fantastic option for a weekend baking project or even a last-minute dessert for guests. I love serving these warm with a glass of cold milk – pure bliss! You can also try adding a pinch of sea salt on top before baking for an extra flavor dimension, or even swap out some of the Cadbury eggs for mini chocolate chips if they’re not readily available. Don’t be intimidated by browning butter; it’s a simple step that elevates these cookies to a whole new level. Give these Brown Butter Cadbury Egg Cookies a try – I promise you won’t regret it!
Frequently Asked Questions:
Why are my cookies spreading too much?
Often, cookie spread is due to the butter being too soft or melted when creamed with the sugar, or if the dough is too warm. Make sure your butter is properly cooled after browning before creaming, and consider chilling the dough for at least 30 minutes before baking. This helps the fat solidify, leading to thicker, chewier cookies.
Can I make these cookies ahead of time?
Absolutely! The cookie dough can be made ahead and stored in the refrigerator for up to 3 days, or frozen for up to 3 months. If baking from chilled dough, you might need to add a minute or two to the baking time. For frozen dough, bake from frozen, again adjusting the baking time as needed.
What if I can’t find Cadbury Eggs?
No problem at all! You can substitute with other crème-filled chocolate eggs, or even chop up regular Cadbury bars into bite-sized pieces. Mini chocolate chips also make a delicious alternative if you’re a big chocolate fan!
Brown Butter Cadbury Egg Cookies
Deliciously chewy cookies featuring the rich flavor of browned butter and the delightful crunch of Cadbury Mini Eggs.
Ingredients
-
1 cup (2 sticks) unsalted butter, browned & cooled
-
1 cup brown sugar
-
1/2 cup granulated sugar
-
2 large eggs
-
1 tsp vanilla extract
-
2 1/2 cups all-purpose flour
-
1 tsp baking soda
-
1/2 tsp salt
-
1 1/2 cups chopped Cadbury Mini Eggs
Instructions
-
Step 1
In a large bowl, cream together the browned and cooled butter, brown sugar, and granulated sugar until light and fluffy. -
Step 2
Beat in the eggs one at a time, then stir in the vanilla extract. -
Step 3
In a separate bowl, whisk together the flour, baking soda, and salt. -
Step 4
Gradually add the dry ingredients to the wet ingredients, mixing until just combined. Do not overmix. -
Step 5
Gently fold in the chopped Cadbury Mini Eggs. -
Step 6
Drop rounded tablespoons of dough onto a baking sheet lined with parchment paper, leaving about 2 inches between cookies. -
Step 7
Bake in a preheated oven at 350°F (175°C) for 9-11 minutes, or until the edges are golden brown and the centers are still slightly soft. -
Step 8
Let the cookies cool on the baking sheet for a few minutes before transferring them to a wire rack to cool completely.
Important Information
Nutrition Facts (Per Serving)
It is important to consider this information as approximate and not to use it as definitive health advice.
Allergy Information
Please check ingredients for potential allergens and consult a health professional if in doubt.