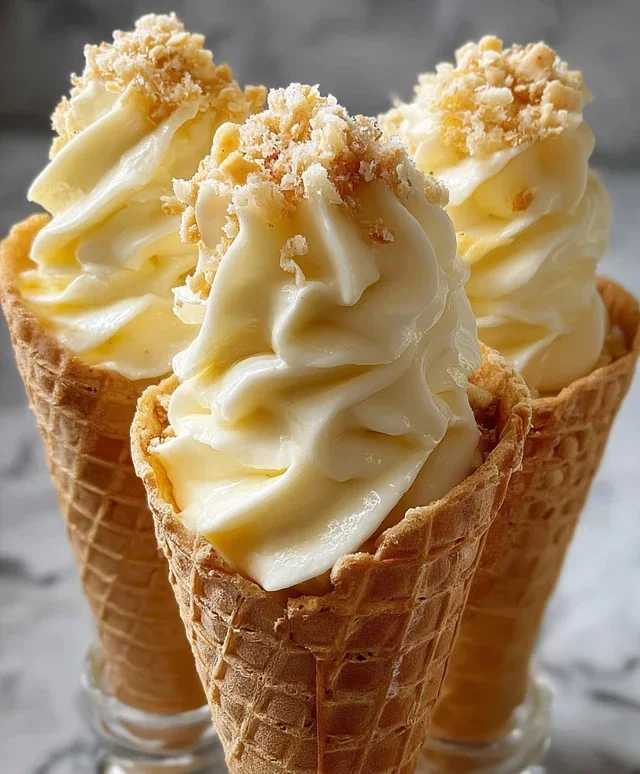
Banana Pudding Cheesecake Cones – Dreamy Dessert
Banana Pudding Cheesecake Cones – prepare yourselves, because this dessert is about to become your new obsession. Forget everything you thought you knew about combining two beloved treats. We’ve taken the creamy, dreamy indulgence of banana pudding and the rich, decadent tang of cheesecake, then reimagin extracted them into the most delightful handheld dessert: the Banana Pudding Cheesecake Cone. Imagin extracte the velvety smooth texture of cheesecake filling swirled with sweet banana flavor, all nestled inside a crisp, golden waffle cone. It’s a symphony of textures and tastes that will have you reaching for just one more. This isn’t just a dessert; it’s an experience. The playful presentation, the perfect balance of sweet and tart, and the sheer joy of eating cheesecake and banana pudding out of a cone are what make these Banana Pudding Cheesecake Cones so incredibly special and undeniably craveable.
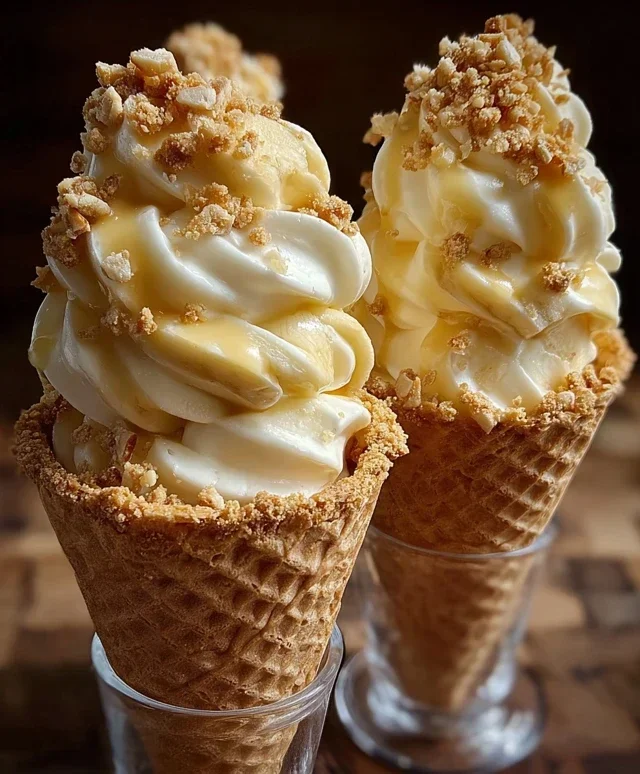
Banana Pudding Cheesecake Cones
Get ready to embark on a dessert adventure that’s truly out of this world! We’re taking two beloved classics – creamy, dreamy banana pudding and decadent cheesecake – and transforming them into fun, portable, and utterly irresistible cones. These Banana Pudding Cheesecake Cones are perfect for parties, a special treat, or just when you’re craving something exceptionally delicious. The combination of textures and flavors is simply divine: the cool, smooth cheesecake filling with hints of banana, the crunchy waffle cone, and the sweet crum extractble topping. Let’s dive in and create some magic!
Ingredients:
Crafting the Creamy Cheesecake Filling
The heart of our Banana Pudding Cheesecake Cones is this luscious cheesecake mixture. We’re going to start by ensuring our cream cheese is perfectly softened. This is a crucial step for achieving a smooth, lump-free filling. If your cream cheese is still firm, you can microwave it in 10-second increments until it’s pliable, but be careful not to melt it. In a medium bowl, beat the softened cream cheese with an electric mixer until it’s completely smooth and creamy. This will take about a minute or two.
Next, we’ll add the sweetness with powdered sugar. Sift the powdered sugar over the cream cheese to prevent any clumpy bits from affecting the texture. Beat the powdered sugar into the cream cheese until it’s well combined and the mixture is light and fluffy. This is where the base of our cheesecake flavor truly begin extracts to develop. Then, we’ll incorporate the vanilla extract for that classic, warm aroma and taste that complements both banana and cheesecake so beautifully. Mix this in until just combined.
Now for the lighter, airier component. We’ll gently fold in the whipped heavy whipping cream. This step is key to making our filling feel more like a mousse and less like a dense cheesecake. Use a spatula and fold the cream in carefully to preserve as much of the air as possible. You want to achieve a uniform, creamy mixture without overmixing, which could deflate the whipped cream. This will give us that signature light and airy texture that makes these cones so delightful.
Infusing with Banana Pudding Flavor
While our cheesecake base is ready, it’s time to bring in the star flavor: banana pudding! In a separate bowl, combine the instant banana pudding mix with the cold milk. Whisk this together vigorously for about two minutes, or until it starts to thicken. It’s important to use cold milk here, as it helps the pudding set properly and achieve the right consistency. Let this pudding mixture sit for about 5 minutes to allow it to fully thicken to a pudding consistency.
Once the pudding has thickened, we’ll gently fold it into our prepared cream cheese mixture. Again, use a spatula for this step and fold with care. You want to incorporate the banana pudding throughout the cream cheese base without beating it too vigorously. The goal is to have streaks or swirls of banana pudding throughout the cheesecake mixture, creating a visually appealing and flavor-packed filling. This is what truly bridges the gap between cheesecake and banana pudding, making these cones so unique.
Assembling the Waffle Cone Masterpieces
Now for the fun part – assembling our delicious creations! Take your waffle cones and gently place them upright in a sturdy container or a muffin tin to keep them from tipping over. This will make filling them much easier and less messy.
First, we’ll add a layer of our crushed vanilla wafers or grabeef ham crackers to the bottom of each cone. This provides a delightful crunch and acts as a base for our filling, preventing the cone from becoming soggy too quickly. You can add about a tablespoon or so into each cone.
Next, we’ll carefully spoon or pipe our banana pudding cheesecake filling into each waffle cone. Fill them generously, but avoid overfilling to prevent spills. You can use a spoon for this, or for a neater finish, you can use a piping bag with a large round tip. Ensure the filling reaches all the way down to the crushed wafer layer.
After filling the cones, we’ll add our delicious toppings. Drizzle generously with caramel sauce or sweetened condensed milk. The sweetness and richness of these drizzles perfectly complement the creamy filling. Finally, sprinkle a little extra crushed vanilla wafers over the top of each cone for added texture and visual appeal.
Chilling and Enjoying
To ensure the flavors meld together and the filling sets up beautifully, it’s best to chill the cones before serving. Place the assembled cones back into their sturdy container or muffin tin and refrigerate them for at least 30 minutes. This allows the filling to firm up slightly and makes them easier to handle. The chilling process is essential for the perfect bite, where the creamy filling is cool and slightly set against the crunchy cone and topping.
Once chilled, your Banana Pudding Cheesecake Cones are ready to be devoured! Grab one and take a bite into a symphony of textures and flavors. The creamy, tangy cheesecake, the sweet banana pudding notes, the crunchy cone, and the delightful toppings all come together in a harmonious explosion of deliciousness. These are best enjoyed right away after chilling for that ultimate textural contrast. Prepare for smiles all around!
Conclusion:
There you have it – the ultimate guide to creating your very own Banana Pudding Cheesecake Cones! This recipe truly elevates a classic comfort dessert into something spectacular. The velvety smooth cheesecake filling, swirled with sweet banana goodness and topped with creamy whipped cream and crushed cookies, creates a symphony of textures and flavors that will have everyone beggin extractg for more. They’re not just delicious; they’re visually stunning, making them perfect for any special occasion or just a delightful weekend treat.
I highly recommend serving these cones chilled for the best experience. They’re fantastic on their own, but a sprinkle of extra cookie crum extractbs or a fresh banana slice on top adds an extra touch of elegance. Don’t be afraid to get creative with variations! You could try adding a hint of rum extract extract to the cheesecake for an adult twist, or even incorporate some caramel drizzle between the layers for an extra decadent bite. The possibilities are endless!
I truly hope you’ll give this Banana Pudding Cheesecake Cone recipe a try. It’s a rewarding bake that delivers on both taste and presentation, and I’m confident you’ll fall in love with it just as much as I have. So grab your ingredients, get your aprons on, and prepare to impress yourself and your loved ones!
Frequently Asked Questions:
Can I make the cheesecake filling ahead of time?
Absolutely! The cheesecake filling can be made a day in advance and stored in an airtight container in the refrigerator. This can significantly reduce your prep time on the day you plan to assemble the cones.
What kind of cones work best for this recipe?
Waffle cones are generally the sturdiest and most recommended for this recipe, as they can hold the weight of the cheesecake filling and toppings without becoming soggy too quickly. Sugar cones can also work, but they are more delicate.
How should I store leftover Banana Pudding Cheesecake Cones?
It’s best to store any leftovers in an airtight container in the refrigerator. They will keep well for about 2-3 days, though the cones may soften slightly over time. Enjoy them soon for the best texture!
Banana Pudding Cheesecake Cones
A delightful no-bake dessert featuring layers of creamy banana pudding and cheesecake filling, served in crispy waffle cones and topped with crushed cookies and caramel.
Ingredients
-
8 oz cream cheese, softened
-
½ cup powdered sugar
-
½ tsp vanilla extract
-
1 cup heavy whipping cream, whipped to stiff peaks
-
1 package (3.4 oz) instant banana pudding mix
-
2 cups cold milk
-
8 waffle cones
-
½ cup crushed vanilla wafers
-
Caramel sauce or sweetened condensed milk drizzle
-
Extra crushed vanilla wafers
Instructions
-
Step 1
In a large bowl, beat the softened cream cheese until smooth. Gradually beat in the powdered sugar and vanilla extract until well combined. -
Step 2
Gently fold the whipped heavy cream into the cream cheese mixture until no streaks remain. This is your cheesecake filling. -
Step 3
In a separate medium bowl, whisk together the instant banana pudding mix and cold milk until smooth and thickened. Let it sit for about 5 minutes to set. -
Step 4
To assemble the cones, spoon a layer of the cheesecake filling into the bottom of each waffle cone, followed by a layer of banana pudding. Repeat layers until cones are filled. -
Step 5
Top each cone with a drizzle of caramel sauce or sweetened condensed milk and a sprinkle of crushed vanilla wafers. -
Step 6
For best results, chill the assembled cones for at least 15 minutes before serving.
Important Information
Nutrition Facts (Per Serving)
It is important to consider this information as approximate and not to use it as definitive health advice.
Allergy Information
Please check ingredients for potential allergens and consult a health professional if in doubt.