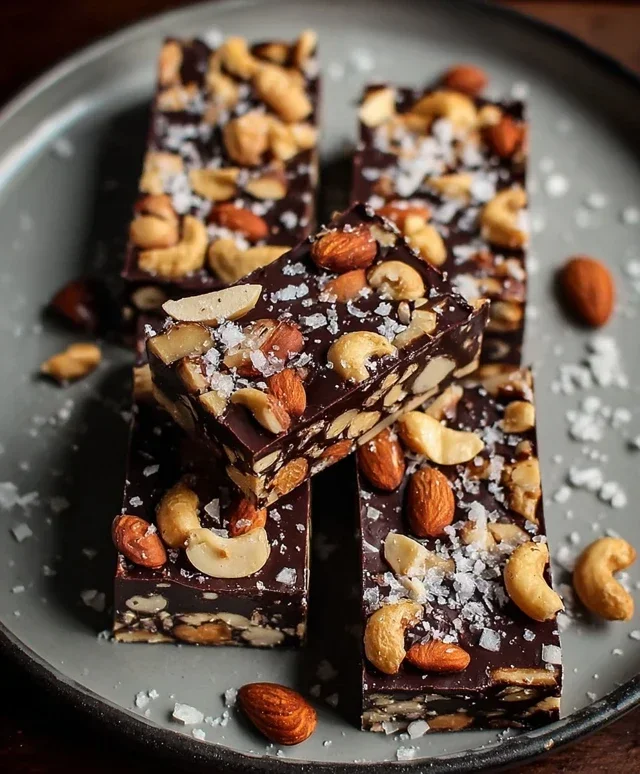
Dark Chocolate Sea Salt Nut Bars-Easy Treat
Dark Chocolate and Sea Salt Nut Bars are more than just a treat; they’re a little bite of pure bliss. I absolutely adore these. There’s something undeniably addictive about the rich, slightly bitter notes of dark chocolate playing counterpoint with the intense crunch of toasted nuts. And then, that whisper of sea salt. Oh, that sea salt! It elevates every single flavor, cutting through the sweetness and awakening your taste buds in the most delightful way. This is why people love them so much – it’s a sophisticated yet wonderfully satisfying snack that feels both indulgent and wholesome. What makes these Dark Chocolate and Sea Salt Nut Bars truly special is the perfect balance. It’s not too sweet, not too salty, just a harmonious symphony of textures and tastes that will have you reaching for a second, and maybe even a third, bar. Get ready to discover your new favorite go-to.
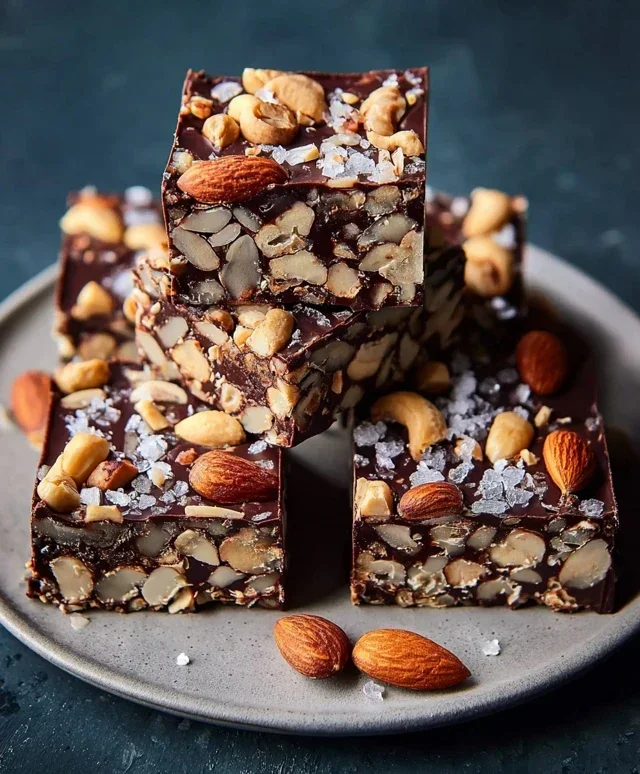
Dark Chocolate and Sea Salt Nut Bars
If you’re anything like me, you love a good snack that balances sweet and salty, with a satisfying crunch. These Dark Chocolate and Sea Salt Nut Bars are exactly that! They’re incredibly easy to make, require no baking, and are perfect for satisfying those midday cravings or even as a little post-workout treat. The combination of rich dark chocolate, the satisfying chegrape juicess of the nuts, the delicate crispness of puffed rice, and the delightful pop of sea salt is simply irresistible. Plus, they’re incredibly versatile – feel free to play around with your favorite nuts!
Ingredients:
Instructions:
1. Prepare Your Nut Mixture
The first step is to get your nuts ready. I like to use a blend for a variety of textures and flavors, but feel free to use just one type if that’s what you have on hand. I’ve found that a mix of cashews, peanuts, and almonds offers a great balance. You want your nuts to be roughly chopped. You don’t want them to be powder, but rather in bite-sized pieces that will hold together well. I usually pulse them a few times in a food processor or give them a good chop with a sharp knife. Don’t over-process them into a paste; we want distinct nutty pieces. In a large bowl, combine your chopped nuts with the puffed rice. The puffed rice adds a wonderful lightness and crunch to the bars, preventing them from becoming too dense. Give everything a gentle stir to distribute the ingredients evenly.
2. Create the Binding Syrup
Next, we’ll create the delicious binding syrup that will hold all our wonderful ingredients together. In a small saucepan over medium-low heat, gently warm the brown rice syrup. You don’t need to boil it; just make it warm enough to be pourable and to help it coat the nuts and puffed rice smoothly. While the syrup is warming, stir in the vanilla extract and the 1/2 teaspoon of sea salt. The vanilla adds a lovely depth of flavor, and the sea salt is crucial for that signature sweet and salty balance. Once the syrup is warm and everything is combined, carefully pour this mixture over the nut and puffed rice mixture in your large bowl.
3. Combine and Press
Now comes the fun part of bringin extractg everything together! Using a sturdy spatula or your hands (lightly greased or dampened to prevent sticking), thoroughly mix the syrup into the dry ingredients. You want to ensure that every piece of nut and puffed rice is coated in the sticky, flavorful syrup. This might take a minute or two of vigorous mixing. Once everything is well combined, transfer the mixture to a prepared baking dish. I usually line an 8×8 inch square baking dish with parchment paper, leaving some overhang on the sides. This makes it super easy to lift the bars out later. Press the mixture down firmly and evenly into the dish. This is a critical step for creating bars that will hold their shape. The firmer you press, the more compact and less crum extractbly your bars will be. I like to use the bottom of a glass or a flat-bottomed measuring cup to get a really compact and even surface.
4. Chill and Set
Once your mixture is firmly pressed into the pan, it’s time to let it set. Place the baking dish in the refrigerator for at least 2 hours, or until the mixture is firm and solid. Chilling allows the brown rice syrup to firm up, binding all the ingredients together. You can also speed this up by popping it in the freezer for about 30-45 minutes if you’re in a hurry, but be careful not to freeze it completely solid. The goal is a firm, cohesive block.
5. Melt the Chocolate and Finish
While your bars are chilling, you can prepare the dark chocolate topping. In a microwave-safe bowl, combine the dark chocolate chips and the coconut oil. Microwave in 30-second intervals, stirring well after each interval, until the chocolate is completely melted and smooth. Coconut oil helps the chocolate melt smoothly and gives it a nice sheen when it sets. Once the bars are firmly set, carefully lift them out of the pan using the parchment paper overhang. Place the slab on a cutting board. Pour the melted dark chocolate evenly over the top of the chilled bar mixture. Spread it out with a spatula to cover the entire surface. For that extra touch of deliciousness and visual appeal, sprinkle the flaky sea salt over the melted chocolate while it’s still wet. The flaky salt will adhere beautifully and provide those delightful little bursts of saltiness with every bite.
6. Slice and Enjoy
Allow the chocolate to set completely. You can do this by leaving it at room temperature for about an hour, or by placing it back in the refrigerator for about 30 minutes to speed up the process. Once the chocolate is firm, use a sharp knife to cut the slab into your desired bar shapes. I usually cut mine into about 10-12 bars. These bars are best stored in an airtight container in the refrigerator, especially in warmer weather, to keep the chocolate from melting. They’ll stay delicious for up to a week, though they rarely last that long in my house! Enjoy these delightful homemade treats!
Conclusion:
These Dark Chocolate and Sea Salt Nut Bars are an absolute winner for anyone craving a satisfying, healthy-ish treat. The perfect balance of rich, dark chocolate, crunchy nuts, and that irresistible hint of sea salt makes them incredibly moreish. They’re wonderfully simple to whip up, making them ideal for busy weeks or last-minute snack emergencies. I love that they provide sustained energy without a sugar crash, and they’re so versatile!
Enjoy these bars as a post-workout refuel, a delightful afternoon pick-me-up with your coffee, or even crum extractbled over yogurt for an extra layer of texture and flavor. For variations, feel free to experiment with different nut combinations like almonds and pistachios, or add dried cranberries for a tart counterpoint. You could also introduce a hint of spice with a pinch of cayenne pepper.
I genuinely encourage you to give this Dark Chocolate and Sea Salt Nut Bars recipe a try. You won’t be disappointed by the incredible flavor and the ease of preparation. They’re a fantastic addition to your healthy snack repertoire.
Frequently Asked Questions:
Can I make these bars vegan?
Absolutely! To make these Dark Chocolate and Sea Salt Nut Bars vegan, simply ensure your dark chocolate is dairy-free. Most dark chocolates above 70% cocoa content are naturally vegan, but it’s always worth checking the ingredients list to be sure. You can also use a vegan binder like agave nectar or maple syrup instead of honey if your recipe calls for it.
How long do these bars keep?
These delicious bars will stay fresh in an airtight container at room temperature for about a week. For longer storage, you can keep them in the refrigerator for up to two weeks, or even freeze them for a couple of months. Simply thaw them at room temperature before enjoying.
What if I don’t have a specific type of nut?
That’s the beauty of these bars – they are incredibly forgiving! You can substitute any of the nuts called for with others you have on hand. Pecans, walnuts, cashews, or even sunflower seeds and pumpkin seeds work wonderfully. Just aim for a similar total amount of nuts.
Dark Chocolate and Sea Salt Nut Bars
Chewy and satisfying nut bars layered with dark chocolate and a hint of sea salt. Perfect for a quick snack or healthy treat.
Ingredients
-
2 1/2 cups unsalted nuts of choice (3/4 cup cashews, 3/4 cup peanuts, 1 cup almonds)
-
1/2 cup puffed rice
-
1/4 cup brown rice syrup
-
1 1/2 teaspoon vanilla extract
-
1/2 teaspoon sea salt
-
1 cup dark chocolate chips
-
2 teaspoons coconut oil
-
flaky salt for topping (optional)
Instructions
-
Step 1
Line an 8×8 inch baking pan with parchment paper, leaving an overhang on the sides. -
Step 2
In a large bowl, combine the chopped nuts and puffed rice. -
Step 3
In a small saucepan over low heat, warm the brown rice syrup, vanilla extract, and 1/2 teaspoon sea salt until just combined and slightly fluid. -
Step 4
Pour the warm syrup mixture over the nut and puffed rice mixture. Stir well to coat everything evenly. -
Step 5
Press the mixture firmly and evenly into the prepared baking pan. -
Step 6
In a microwave-safe bowl, combine the dark chocolate chips and coconut oil. Microwave in 30-second intervals, stirring between each, until smooth and melted. -
Step 7
Pour the melted chocolate over the nut mixture in the pan, spreading it evenly. -
Step 8
If using, sprinkle flaky salt over the chocolate layer. Refrigerate for at least 30 minutes, or until the chocolate is set. -
Step 9
Lift the bars out of the pan using the parchment paper overhang. Cut into 12 bars.
Important Information
Nutrition Facts (Per Serving)
It is important to consider this information as approximate and not to use it as definitive health advice.
Allergy Information
Please check ingredients for potential allergens and consult a health professional if in doubt.