Lucky St. Patrick’s Day Desserts – Easy & Fun Recipes
St. Patrick’s Day desserts are more than just a sweet treat; they’re a vibrant celebration of Irish culture and the joyous spirit of spring. As March 17th approaches, there’s an undeniable urge to embrace all things green, gold, and delightfully delicious. From the classic Irish cream-infused delights to playful sbeef hamrock-shaped confections, these St. Patrick’s Day desserts capture the imagin extractation and warm the heart. We all adore them because they offer a whimsical escape, a chance to indulge in rich flavors and festive colors that perfectly complement the holiday’s cheerful atmosphere. What makes these particular St. Patrick’s Day desserts truly special is their ability to transform simple ingredients into edible works of art, bringin extractg a touch of luck and merriment to any gathering.
Get Ready to Bake Your Luck!
Let’s dive into some enchanting recipes!

St. Patrick’s Day Desserts: A Celebration of Green and Sweet Delights
Get ready to sbeef hamrock your way into a deliciously festive St. Patrick’s Day with these delightful dessert recipes! This year, let’s embrace the spirit of Ireland with treats that are as fun to make as they are to eat. From vibrant green hues to rich chocolatey goodness, I’ve gathered a selection of desserts that are sure to impress your family and friends. Whether you’re a seasoned baker or just looking for a simple way to add some holiday cheer to your table, these recipes are designed to be accessible and utterly delicious. Let’s dive into the sweet side of St. Patrick’s Day!
Emerald Isle Brownies
These brownies are a classic for a reason, but we’re giving them a St. Patrick’s Day twist with a vibrant green swirl. They are fudgy, rich, and have a delightful surprise of green marbling that looks like rolling emerald hills.
Ingredients:
Instructions:
Prepare the Brownie Batter
Preheat your oven to 350°F (175°C). Grease and flour a 9×13 inch baking pan, or line it with parchment paper for easy removal. In a large bowl, whisk together the melted butter and granulated sugar until well combined. Then, beat in the eggs one at a time, ensuring each is fully incorporated before adding the next. Stir in the vanilla extract. This forms the base of our rich brownie batter.
Combine Dry Ingredients
In a separate medium bowl, whisk together the all-purpose flour, unsweetened cocoa powder, baking powder, and salt. Sifting these ingredients together can help prevent lumps and ensure a smoother, more even texture in your brownies. Gradually add the dry ingredients to the wet ingredients, mixing on low speed or by hand until just combined. Be careful not to overmix the batter, as this can lead to tough brownies.
Create the Green Swirl Mixture
In another small bowl, combine the green food coloring and sour cream. Stir until you have a smooth, vibrant green mixture. The sour cream adds a subtle tang that complements the chocolate, while the food coloring gives us that festive St. Patrick’s Day flair. If you want a more intense green, you can add a few more drops of food coloring.
Assemble and Swirl
Pour about two-thirds of the chocolate brownie batter into the prepared baking pan and spread it evenly. Dollop spoonfuls of the green sour cream mixture over the chocolate batter. Then, gently pour the remaining chocolate batter over the green dollops. Using a knife or a toothpick, carefully swirl the green mixture into the chocolate batter to create a marbled effect. Don’t over-swirl; you want distinct ribbons of green to be visible. This is where the magic happens, creating that beautiful “Emerald Isle” appearance!
Bake and Cool
Bake for 25-30 minutes, or until a toothpick inserted into the center comes out with moist crum extractbs attached, not wet batter. Overbaking will result in dry brownies, so keep a close eye on them during the last few minutes of baking. Once baked, let the brownies cool completely in the pan on a wire rack before cutting them into squares. Allowing them to cool fully makes them easier to cut and prevents them from crum extractbling. For an extra touch, you can dust them with a bit of powdered sugar or sprinkle some green sprinkles on top once cooled.
Lucky Charms Marshmallow Treats
Who says you can’t have fun with your desserts? These no-bake treats are incredibly easy and incorporate everyone’s favorite cereal for a pop of color and sweetness. They’re a guaranteed hit with kids and adults alike!
Ingredients:
Instructions:
Melt the Marshmallows
In a large microwave-safe bowl, combine the mini marshmallows and butter. Microwave on high for 1 minute, then stir. Continue microwaving in 30-second intervals, stirring after each, until the marshmallows are completely melted and smooth. Be careful not to overheat them, as they can burn. Stirring in the vanilla extract at this stage will infuse the entire treat with a lovely aroma.
Combine Cereal and Marshmallow Mixture
In a very large bowl, add the crispy rice cereal. Pour the melted marshmallow mixture over the cereal. Using a greased spatula or your hands (lightly greased with butter or cooking spray to prevent sticking), gently but thoroughly mix the cereal into the marshmallow mixture until it’s evenly coated. This step requires a bit of effort, so work quickly before the marshmallows start to harden.
Add the Lucky Charms
Gently fold in the Lucky Charms cereal. You want to distribute the colorful marshmallows and oat pieces throughout the mixture without crushing them too much. If you’re using additional green candies or sprinkles, now is the time to fold them in for an extra festive touch.
Press into Pan
Grease a 9×13 inch baking pan with butter or cooking spray, or line it with parchment paper. Transfer the cereal mixture into the prepared pan. Using a greased spatula or your hands, press the mixture down firmly and evenly into the pan. This step is crucial for ensuring your treats hold their shape and don’t fall apart when cut. The firmer you press, the more compact and sliceable your treats will be.
Cool and Cut
Let the marshmallow treats cool completely at room temperature for at least 30 minutes. Once cooled, use a sharp knife (also lightly greased if needed) to cut them into squares or fun St. Patrick’s Day shapes using cookie cutters. These are best enjoyed the same day they are made for optimal freshness and texture.
These St. Patrick’s Day desserts are a simple yet effective way to bring a little bit of Irish cheer and deliciousness to your celebration. Enjoy baking and more importantly, enjoy eating them! Sláinte!
Conclusion:
I hope you’ve been inspired by these delightful St. Patrick’s Day desserts! They offer a wonderful way to add a touch of Irish cheer to your celebrations. Whether you choose the vibrant green cupcakes, the decadent chocolate non-alcoholic stout cake, or the simple yet charming sbeef hamrock cookies, each recipe is designed to be both delicious and festive. These treats are perfect for parties, family gatherings, or even just a special indulgence for yourself. Don’t be afraid to experiment with the variations I’ve suggested; feel free to adapt them to your personal taste or dietary needs. The joy of baking these St. Patrick’s Day desserts lies in the creativity and the shared experience. So gather your ingredients, put on your favorite Irish music, and get baking. I encourage you to try at least one of these recipes – I promise you won’t be disappointed! They are sure to bring smiles and a touch of luck to your St. Paddy’s Day festivities.
Frequently Asked Questions:
Can I make these desserts ahead of time?
Absolutely! Most of these St. Patrick’s Day desserts can be prepared a day or two in advance. For example, cupcakes can be baked and cooled, then frosted closer to serving time. Cookies can be baked and stored in an airtight container. Cakes can often be baked and stored at room temperature, or frosted and refrigerated. This makes them excellent options for stress-free entertaining.
What are some non-green dessert ideas for St. Patrick’s Day?
While green is a classic St. Patrick’s Day color, you don’t have to stick to it! Consider rich chocolate desserts (like the non-alcoholic stout cake!), caramel-flavored treats, or even simple shortbread cookies. You can still incorporate a festive theme with clover or gold-coin decorations using edible glitter or gold dusting.
Are these recipes suitable for begin extractner bakers?
Yes, I’ve aimed to include recipes that cater to various skill levels. The sbeef hamrock cookies and basic cupcakes are particularly begin extractner-friendly. The chocolate non-alcoholic stout cake might be a bit more involved, but with clear instructions, even novice bakers can achieve fantastic results. Don’t hesitate to try them out!
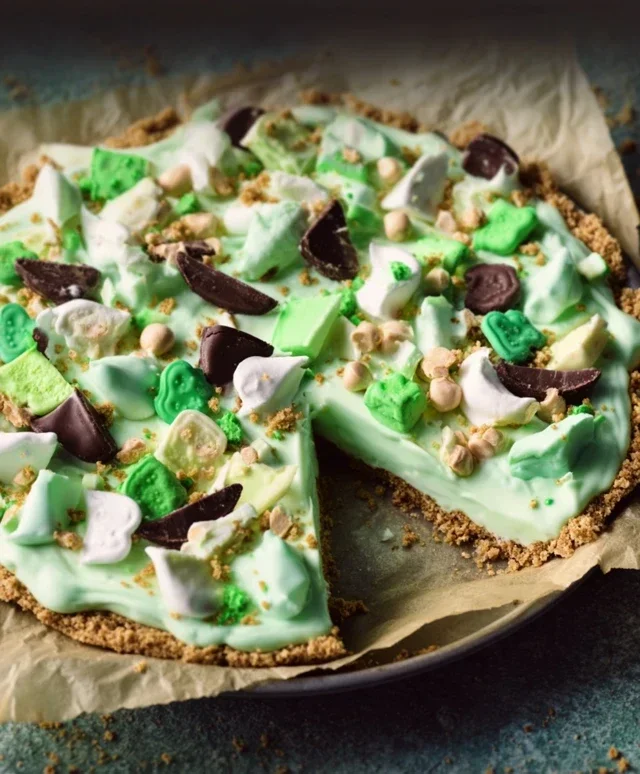
St. Patrick’s Day Dessert Extravaganza
A collection of festive St. Patrick’s Day treats celebrating with green and delicious flavors. This recipe features a vibrant green dessert perfect for any St. Paddy’s Day celebration.
Ingredients
-
2 cups all-purpose flour
-
1 cup granulated sugar
-
1/2 cup unsalted butter, softened
-
2 large eggs
-
1 teaspoon vanilla extract
-
1/2 cup milk
-
1/4 cup vegetable oil
-
Green food coloring
-
Cream cheese frosting (store-bought or homemade)
Instructions
-
Step 1
Preheat your oven to 350°F (175°C). Grease and flour a baking pan. -
Step 2
In a large bowl, cream together the softened butter and granulated sugar until light and fluffy. -
Step 3
Beat in the eggs one at a time, then stir in the vanilla extract. -
Step 4
In a separate bowl, whisk together the flour, milk, and vegetable oil. -
Step 5
Gradually add the dry ingredients to the wet ingredients, mixing until just combined. Add green food coloring until desired shade is achieved. -
Step 6
Pour the batter into the prepared baking pan and bake for 30-35 minutes, or until a toothpick inserted into the center comes out clean. -
Step 7
Let the cake cool completely before frosting with cream cheese frosting.
Important Information
Nutrition Facts (Per Serving)
It is important to consider this information as approximate and not to use it as definitive health advice.
Allergy Information
Please check ingredients for potential allergens and consult a health professional if in doubt.