Easy Pickled Red Onions- Quick & Delicious Recipe
Pickled red onions are an absolute game-changer in my kitchen, and I’m so excited to share this recipe with you! If you’ve ever wondered what adds that vibrant pop of color and perfectly tangy, slightly sweet crunch to your tacos, salads, or avocado toast, chances are it’s these beauties. People rave about pickled red onions because they’re incredibly versatile. They transform simple dishes into something extraordinary with minimal effort. What makes them truly special is the magic that happens when humble red onions meet vinegar and a touch of sweetness. The sharp bite mellows into a delightful tang, while the beautiful magenta hue intensifies, making them as pleasing to the eye as they are to the palate. Get ready to elevate your everyday meals with this incredibly easy and rewarding recipe for pickled red onions.
Pickled Red Onions
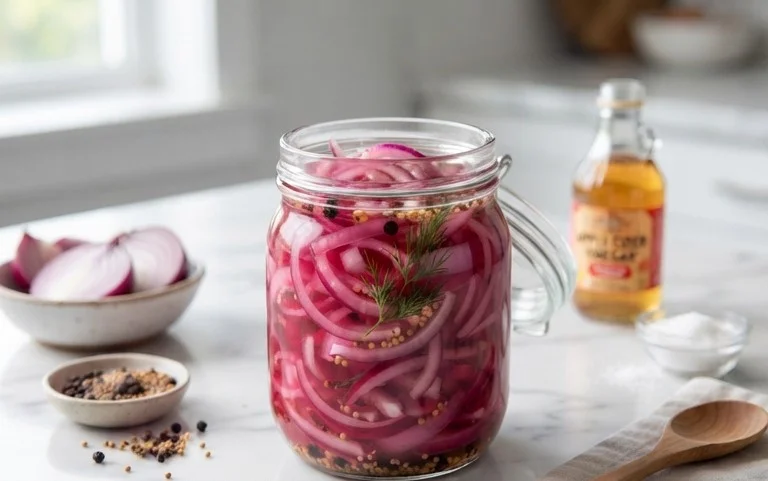
There are few things as versatile and instantly elevating as a jar of vibrant, tangy pickled red onions. These beauties are not just pretty to look at, with their stunning ruby hue; they pack a punch of flavor that can transform a simple taco, a humble sandwich, a rich salad, or even a creamy avocado toast from ordinary to extraordinary. Forget store-bought options that are often too vinegary or lack that perfect crunch. Making your own pickled red onions is incredibly simple, requiring just a handful of pantry staples and a little bit of patience. Once you’ve tasted these homemade gems, you’ll find yourself reaching for them constantly, adding a bright, zesty counterpoint to almost any dish. They are the secret ingredient you never knew you needed, and once you master this easy recipe, you’ll wonder how you ever lived without them. The process itself is more about the waiting than the doing, making it a perfect begin extractner-friendly project for anyone looking to add a touch of culinary magic to their kitchen.
Ingredients:
Getting Started: Prepping Your Onions
The first step in creating these delightful pickled onions is to prepare your star ingredient: the red onion. For this recipe, we’re using one large red onion. You want to choose an onion that is firm and free of any soft spots or blemishes. Begin extract by peeling away the papery outer layers of the onion. Then, slice off the stem end and the root end. The root end can be a little tricky as it holds the layers together. You can either slice it off completely or just trim it so it’s easier to manage. Now, the crucial part is how you slice the onion. For the best texture and visual appeal, slice the onion thinly, about 1/8-inch thick. You can achieve this using a sharp knife and a steady hand, or if you have one, a mandoline slicer can be a lifesaver here, ensuring uniform slices. Aim for rings or half-moons, depending on how you cut the onion initially. The thinner the slices, the quicker they will pickle and the more tender they will become. Place your thinly sliced red onion into a heatproof bowl or jar.
Creating the Brine: The Heart of the Pickle
Next, we’ll create the flavorful brine that will transform those raw onion slices into tangy, vibrant pickles. This is where the magic happens! In a small saucepan, combine the white vinegar and water. White vinegar is ideal because it has a neutral flavor profile that allows the onion and salt to shine, while its acidity is perfect for pickling. The water helps to mellow out the vinegar just enough. Now, add your sugar and kosher salt to the liquid. If you’re watching your sugar intake or prefer a less sweet pickle, feel free to reduce or omit the sugar entirely. A sugar substitute can also be used here. Kosher salt is recommended because its larger, flakier crystals dissolve easily and contribute a clean, pure saltiness without any anti-caking agents found in table salt.
Heating and Infusing the Brine
Place the saucepan over medium heat on your stovetop. Stir the mixture continuously until the sugar and salt are completely dissolved. You don’t need to bring the brine to a rolling boil, but you do want it to be hot. Heating the brine helps to slightly soften the onions and allows them to absorb the flavors more readily. Once the sugar and salt have dissolved and the liquid is hot (steaming, but not vigorously bubbling), remove the saucepan from the heat. This hot brine will be poured directly over the sliced red onions. The heat is important for initiating the pickling process and ensuring even flavor distribution.
Assembling and Waiting: The Art of Patience
Now it’s time to bring it all together. Carefully pour the hot brine over the sliced red onions in the heatproof bowl or jar. Make sure that all the onion slices are submerged in the liquid. If your bowl isn’t quite large enough, you can transfer the onions and brine to a clean glass jar. Ensure the jar is large enough to comfortably hold the onions and brine, with a little room at the top. You can gently press down on the onions with a spoon to make sure they are fully covered by the brine. Once everything is in its place, allow the mixture to cool at room temperature for about 15-30 minutes. This initial cooling period allows the onions to start their transformation.
After the initial cooling period, cover the bowl or jar tightly. You can use plastic wrap, a lid, or even foil. For the best results, refrigerate your pickled red onions. You’ll start to notice the onions changin extractg color, turning a beautiful pinkish-red, as they marinate in the brine. While they are technically edible after an hour or two, I find that the flavor really develops and the texture becomes perfect after at least 4 hours, or preferably overnight. The longer they sit in the brine, the more intense the flavor will become, and the more tender the onions will get. They will continue to develop in flavor and soften the longer they are stored in the refrigerator.
Enjoying Your Pickled Perfection
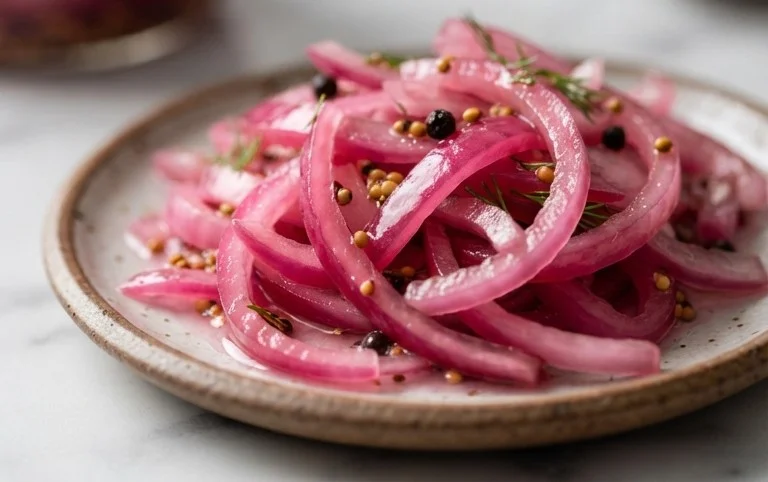
Once your pickled red onions have had ample time to marinate and develop their incredible flavor, they are ready to be enjoyed! You can drain them before using them, or leave a little of the brine on them depending on your preference. These bright, tangy jewels are incredibly versatile. Pile them high on your burgers, tacos, and sandwiches for an instant flavor boost. Add them to salads to provide a sweet and sour counterpoint. They are also fantastic on top of avocado toast, in grain bowls, or as a vibrant garnish for grilled meats and fish. The possibilities are truly endless. Store your pickled red onions in an airtight container in the refrigerator, and they will keep for several weeks, making them a fantastic pantry staple to have on hand for whenever you need a quick and delicious flavor enhancement. Enjoy the taste of homemade!
Conclusion:
And there you have it – your guide to making the most vibrant and delicious pickled red onions! This recipe is truly a kitchen superhero. Not only is it incredibly simple to whip up, but it also transforms humble red onions into a tangy, slightly sweet, and beautifully hued condiment that elevates practically any dish. The satisfying crunch and zesty flavor profile are simply irresistible. From tacos and burgers to salads and charcuterie boards, these pickled red onions add a burst of freshness and visual appeal that’s hard to beat. I’m confident you’ll find yourself reaching for this recipe again and again.
Don’t be afraid to get creative with your own variations! Experiment with different spices like peppercorns, coriander seeds, or even a pinch of chili flakes for a little heat. You can also play around with the sweetness by adjusting the sugar ratio. I highly encourage you to give this recipe a try. It’s a fantastic way to add a gourmet touch to your everyday meals with minimal effort. Happy pickling!
Frequently Asked Questions:
How long do pickled red onions last?
Properly stored in an airtight container in the refrigerator, your pickled red onions should stay fresh and delicious for at least 2-3 weeks. The brine helps to preserve them, and their flavor often deepens over time.
Can I use different types of onions?
While red onions are preferred for their vibrant color and milder flavor when pickled, you can certainly experiment with other onions. White or yellow onions will work, but they won’t yield the same stunning visual appeal, and their flavor profile will be a bit sharper.
What’s the best way to store pickled red onions?
The key is an airtight container. Mason jars are perfect for this! Make sure the onions are fully submerged in the brine. Store them in the refrigerator until you’re ready to enjoy their tangy goodness.
Pickled Red Onions
Quick and easy pickled red onions, perfect for topping tacos, sandwiches, salads, and more. They add a vibrant color and a tangy, slightly sweet crunch.
Ingredients
-
1 large Red onion
-
1 cup White Vinegar
-
1 cup Water
-
1 tablespoon Sugar
-
2 teaspoons Kosher salt
Instructions
-
Step 1
Thinly slice the red onion into rings or half-moons. -
Step 2
In a saucepan, combine the white vinegar, water, sugar, and kosher salt. -
Step 3
Heat the mixture over medium heat, stirring until the sugar and salt are completely dissolved. Do not boil. -
Step 4
Place the sliced red onions into a clean jar or heatproof bowl. -
Step 5
Pour the warm brine over the onions, ensuring they are fully submerged. -
Step 6
Let the onions cool to room temperature, then cover the jar or bowl. -
Step 7
Refrigerate for at least 30 minutes before serving, or for best flavor, allow them to pickle for a few hours or overnight.
Important Information
Nutrition Facts (Per Serving)
It is important to consider this information as approximate and not to use it as definitive health advice.
Allergy Information
Please check ingredients for potential allergens and consult a health professional if in doubt.