Gluten-Free Sweet Potato Tortillas – Vegan Wraps
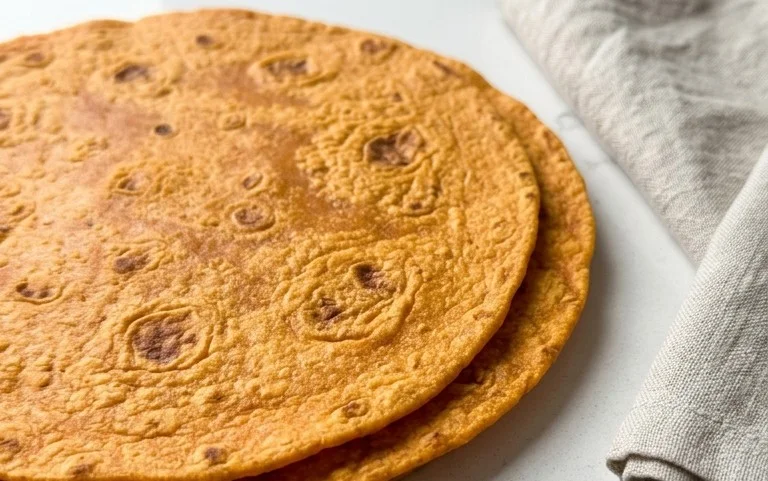
Sweet Potato Tortillas are more than just a gluten-free and vegan alternative; they’re a vibrant, flavorful revolution in your kitchen! If you’ve been searching for a wrap that’s both wholesome and incredibly delicious, look no further. These gorgeous orange beauties are a game-changer, bringin extractg a natural sweetness and a delightful chewy texture to any meal. Forget bland, cardboard-like wraps of the past. What makes these sweet potato tortillas so special is their inherent versatility and the fact that they’re packed with nutrients. They’re perfect for breakfast burritos, hearty lunch wraps, or even as a base for creative appetizers. Imagin extracte the satisfaction of creating your own beautiful, plant-powered meals from scratch, knowing you’re using simple, nourishing ingredients. Get ready to fall in love with these naturally vibrant and wonderfully adaptable sweet potato tortillas!
Sweet Potato Tortillas (Gluten-Free Vegan Wraps)
I’ve been on a quest to create the perfect gluten-free, vegan tortilla for what feels like ages. So many store-bought options are disappointing – either they fall apart, taste bland, or have a weird, chewy texture. But I think I’ve finally cracked the code! These Sweet Potato Tortillas are a revelation. They’re soft, pliable, and have a subtle sweetness from the sweet potato that makes them incredibly versatile. Whether you’re craving a breakfast burrito, a hearty lunch wrap, or even a base for mini pizzas, these are going to become your new go-to. The secret lies in the combination of mashed sweet potato for moisture and flexibility, psyllium husk for binding, and a touch of gluten-free sourdough starter for that delightful tang and better texture. Plus, they’re surprisingly easy to make! Let’s get started.
Ingredients:
Instructions:
1. Prepare the Sweet Potato Base: Start by ensuring your sweet potatoes are perfectly cooked and mashed. I prefer steaming them as it prevents them from absorbing too much water, which can make the dough too sticky. Once steamed or boiled, mash them thoroughly in a bowl until there are no lumps. You want a smooth, consistent puree. Then, add the vegan butter to the warm mashed sweet potato and stir until it’s fully melted and incorporated. This will give the dough a lovely richness and help with its pliability.
2. Activate the Binder and Add Dry Ingredients: In a separate small bowl, combine the psyllium husk with 1 tablespoon of the hot water. Stir it well and let it sit for about 5-10 minutes. You’ll notice it forms a gel-like consistency – this is exactly what we want as it will act as our gluten replacement, binding everything together beautifully. Once the psyllium husk has gelled, add it to the bowl with the sweet potato mixture. Next, add the sea salt, black pepper, onion powder, and garlic powder to the sweet potato mixture and stir to combine.
3. Incorporate the Sourdough Starter and Flour: Now, it’s time to add the star of the show: your gluten-free sourdough starter. Pour the 3/4 cup of active starter into the bowl. The starter not only adds a fantastic depth of flavor but also contributes to the texture, making these tortillas less dense than some other gluten-free alternatives. Gently mix everything together. Gradually add the arrowroot flour, starting with 2 tablespoons, and mix until a dough begin extracts to form. If you’re using the optional baking powder for puffier tortillas, add it now and mix it in. You’re looking for a dough that is soft and slightly sticky, but manageable. If the dough feels too wet and sticky, add the remaining tablespoon of arrowroot flour, a teaspoon at a time, until you reach the desired consistency. Be careful not to add too much flour, as this can make the tortillas tough.
4. Knead and Rest the Dough: Turn the dough out onto a lightly floured surface (use a bit more arrowroot flour or your preferred gluten-free flour for dusting). Gently knead the dough for just a minute or two, just enough to bring it together into a cohesive ball. Over-kneading gluten-free doughs can sometimes make them gummy, so a light touch is key. Place the dough back into the bowl, cover it with a damp kitchen towel or plastic wrap, and let it rest for at least 30 minutes at room temperature. This resting period allows the psyllium husk to fully absorb any remaining liquid and the flavors to meld, resulting in a more pliable and easier-to-handle dough.
5. Shape and Cook the Tortillas: Divide the rested dough into 4-6 equal portions, depending on how large you want your tortillas to be. Roll each portion into a ball. Now, for shaping: you can either use a tortilla press lined with parchment paper or a rolling pin. If using a rolling pin, place a ball of dough between two pieces of parchment paper and roll it out as thinly as possible, aiming for a circle about 6-8 inches in diameter. The thinner you roll them, the more flexible they will be. Heat a dry cast-iron skillet or griddle over medium heat. Carefully place one rolled-out tortilla onto the hot skillet. Cook for about 1-2 minutes per side, or until you see small bubbles forming and the tortilla is lightly golden brown in spots. Don’t overcook them, or they will become brittle. Immediately transfer the cooked tortilla to a clean kitchen towel and cover it. This steaming action within the towel is crucial for keeping them soft and pliable. Repeat this process with the remaining dough portions.
Notes on Gluten-Free Sourdough Starter: If you don’t have active gluten-free sourdough starter, you can still make these! For a simpler binder, you can omit the starter and increase the psyllium husk to 3 teaspoons. You may also need to add an extra tablespoon of hot water to compensate for the moisture from the starter. The flavor will be slightly different but still delicious.
Enjoy these versatile sweet potato tortillas warm, or store them in an airtight container at room temperature for a day or two, or in the refrigerator for up to 4 days. Reheat gently on a skillet or in the microwave to restore their softness. They are perfect for all your favorite wraps, tacos, and quesadillas!
Conclusion:
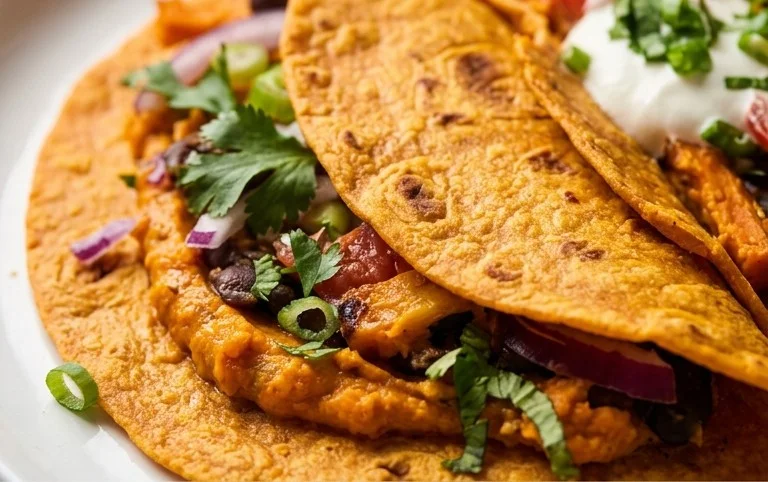
I hope you’re as excited as I am to dive into making these delicious Sweet Potato Tortillas (Gluten-Free Vegan Wraps)! These vibrant, flavorful wraps are a fantastic alternative to traditional flour tortillas, offering a naturally sweet and earthy undertone that elevates any filling. They are incredibly versatile, acting as the perfect base for everything from savory lunch wraps packed with seasoned beans and fresh veggies, to breakfast burritos brimming with tofu scramble and salsa. The soft, pliable texture makes them easy to work with, and the fact that they are both gluten-free and vegan means everyone can enjoy them.
Don’t hesitate to experiment with your favorite fillings! Try them with pulled jackfruit, a spicy lentil stew, or even as a base for mini vegan pizzas. For a fun twist, consider adding a pinch of smoked paprika or cumin to the dough for an extra layer of flavor. I truly encourage you to give this recipe a try. It’s a rewarding way to create healthy, homemade wraps that are both nourishing and incredibly satisfying. You’ll be amazed at how simple and delightful they are to make!
Frequently Asked Questions:
Q: Can I make these sweet potato tortillas ahead of time?
A: Absolutely! Once cooled completely, you can store the sweet potato tortillas in an airtight container at room temperature for up to 2 days, or in the refrigerator for up to 4 days. For longer storage, wrap them well and freeze them for up to 2 months. Thaw them at room temperature or gently reheat them in a skillet or microwave before serving.
Q: My dough is too sticky, what can I do?
A: If your dough is too sticky, it’s likely due to the moisture content of your sweet potato. Try adding a tablespoon of gluten-free flour (like rice flour or tapioca starch) at a time until the dough is manageable but still slightly tacky. Be careful not to add too much, as this can make the tortillas tough. Ensure your sweet potato is well-mashed and not watery.
Q: What kind of sweet potato should I use?
A: Any variety of sweet potato will work well for these tortillas! Jewel or Garnet sweet potatoes are popular choices due to their vibrant orange flesh and sweet flavor. Ensure the sweet potato is cooked until very tender and then thoroughly mashed or pureed for a smooth dough consistency.
Sweet Potato Tortillas (Gluten-Free Vegan Wraps)
Deliciously soft and pliable gluten-free vegan wraps made with sweet potato.
Ingredients
-
2 small sweet potatoes – steamed or boiled (no liquid / mashed)
-
2 tbsp vegan butter
-
1-2 tbsp hot water
-
3/4 tsp sea salt
-
1/4 tsp black pepper
-
1/2 tsp onion powder
-
1/2 tsp garlic powder
-
3/4 cup gluten free sourdough starter
-
2 tsp psyllium husk
-
2-3 tbsp arrowroot flour
-
1/2 tsp baking powder
Instructions
-
Step 1
Mash the steamed or boiled sweet potatoes until very smooth. Ensure no liquid is present. -
Step 2
In a bowl, combine the mashed sweet potato with vegan butter, hot water, sea salt, black pepper, onion powder, and garlic powder. Mix well. -
Step 3
Stir in the gluten-free sourdough starter and psyllium husk until fully incorporated. -
Step 4
Gradually add the arrowroot flour, 1 tablespoon at a time, mixing until a dough forms that is slightly sticky but manageable. Add baking powder if using. -
Step 5
Divide the dough into 6-8 equal portions and roll them into balls. -
Step 6
Place a dough ball between two sheets of parchment paper and roll it out thinly into a circular shape, similar to a tortilla. -
Step 7
Heat a lightly oiled non-stick skillet or griddle over medium heat. Cook each tortilla for 2-3 minutes per side, until lightly browned and cooked through.
Important Information
Nutrition Facts (Per Serving)
It is important to consider this information as approximate and not to use it as definitive health advice.
Allergy Information
Please check ingredients for potential allergens and consult a health professional if in doubt.