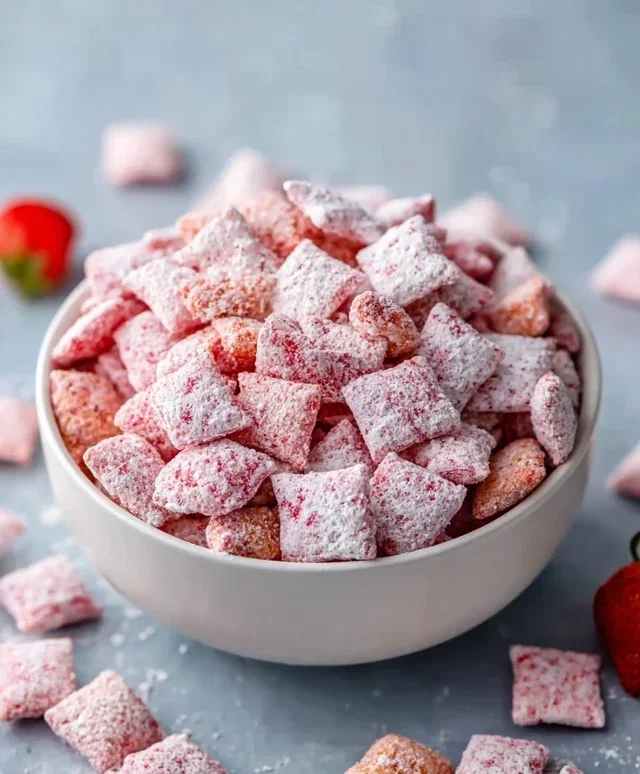
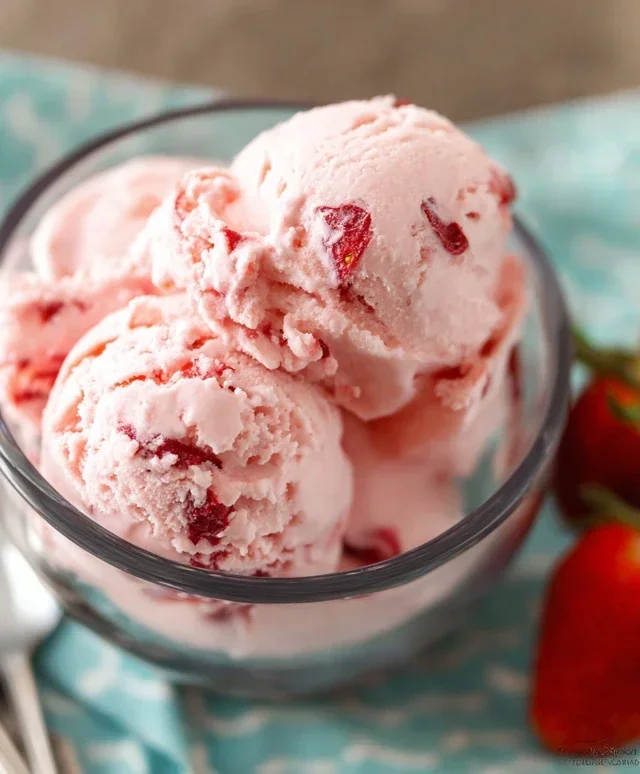
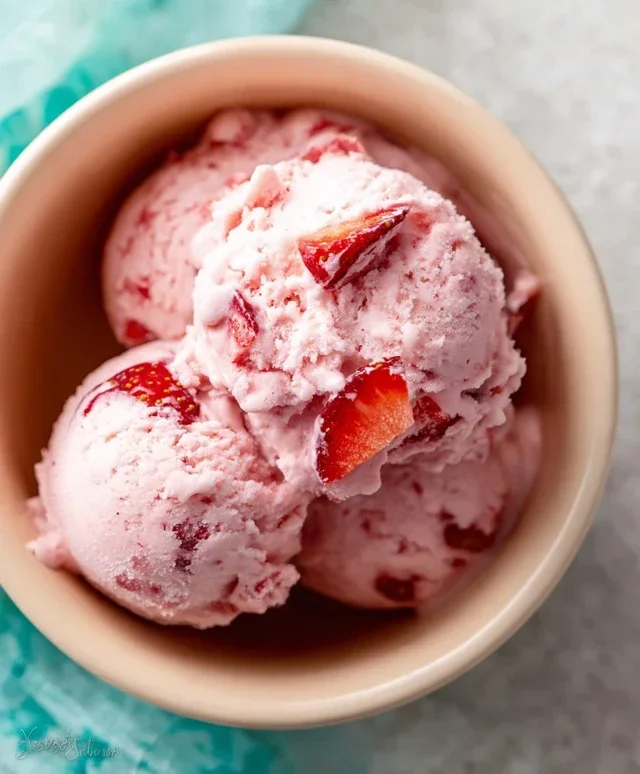
Easy Homemade Strawberry Ice Cream Recipe
Homemade strawberry ice cream is more than just a dessert; it’s a summer ritual, a taste of pure joy in every spoonful. There’s something undeniably magical about that vibrant pink hue and the sweet, slightly tart burst of fresh strawberries. We all adore it because it evokes memories of sun-drenched days, backyard barbecues, and the simple pleasure of a cold, creamy treat on a hot afternoon. What makes this homemade strawberry ice cream so incredibly special is the ability to control the quality of your ingredients, ensuring an intensely fruity flavor that store-bought versions simply can’t match. Forget artificial flavors and excessive stabilizers; this recipe celebrates the natural goodness of ripe strawberries, transforming them into a luscious, velvety ice cream that will have everyone beggin extractg for seconds.
Why You’ll Love This Recipe
The ultimate guide to creating your own delicious homemade strawberry ice cream.
Homemade Strawberry Ice Cream
There’s something undeniably special about homemade ice cream. The creamy texture, the vibrant flavor, and the satisfaction of creating it yourself – it’s a culinary joy that truly elevates a simple dessert. And when that dessert is strawberry ice cream, bursting with the sweet, tart essence of fresh berries, it becomes pure bliss. Forget the store-bought tubs; this recipe will guide you to create a luscious, homemade strawberry ice cream that will have everyone asking for seconds.
The beauty of this recipe lies in its simplicity, relying on fresh, quality ingredients to deliver an exceptional flavor. We’ll be mashing fresh strawberries, infusing them with a touch of sweetness and a hint of citrus to brighten their natural taste, and then combining them with a rich, creamy base. No complex custard-making here – just straightforward steps to achieve a delightful frozen treat.
Ingredients:
Instructions:
Prepare the Strawberry Base:
This first step is crucial for developing that intense strawberry flavor. In a medium bowl, combine the hulled and diced strawberries with the honey, granulated sugar, and lemon juice. The honey adds a nuanced sweetness that complements the berries beautifully, while the granulated sugar provides that classic ice cream sweetness. The lemon juice is a secret weapon here; it doesn’t make the ice cream sour, but rather it amplifies the natural brightness and tang of the strawberries, preventing them from tasting flat or overly sweet. Use a fork or a potato masher to gently mash the strawberries. You want to break them down significantly, but it’s lovely to have a few small chunks remaining for texture. Allow this mixture to sit for at least 30 minutes, or even up to an hour, at room temperature. This maceration process allows the sugar and honey to draw out the juices from the strawberries, creating a wonderfully concentrated syrup and intensifying the berry flavor. Stir it occasionally to ensure the sugar dissolves.
Create the Creamy Base:
While the strawberries are macerating, it’s time to prepare the creamy foundation of our ice cream. In a separate, larger bowl, combine the heavy whipping cream, half and half, and vanilla extract. Whisk these ingredients together until they are well combined and slightly aerated. The heavy whipping cream is essential for that rich, decadent texture we all crave in homemade ice cream. The half and half helps to balance the richness, making the ice cream smooth and scoopable without being overly heavy. The vanilla extract acts as a flavor enhancer, rounding out the taste profile and making the strawberry flavor truly sing. For optimal results, ensure all your dairy products are cold. This will help the ice cream churn more efficiently.
Combine and Chill:
Once the strawberry mixture has macerated for its allotted time and you’ve prepared the creamy base, it’s time to bring them together. Gently pour the macerated strawberry mixture, including all the delicious syrupy juices, into the bowl with the cream mixture. Stir everything together until it’s thoroughly combined. You’ll start to see beautiful pink swirls forming, hinting at the deliciousness to come. At this point, the mixture will still be liquid. To ensure proper freezing and a smooth texture, it’s imperative to chill this base thoroughly. Cover the bowl tightly with plastic wrap and refrigerate it for at least 2 to 4 hours, or preferably overnight. The colder the base, the faster and more efficiently it will churn, resulting in smaller ice crystals and a creamier final product. Don’t rush this chilling step; it’s a vital part of the process.
Churn the Ice Cream:
This is where the magic truly happens! If you have an ice cream maker, follow the manufacturer’s instructions for churning. Typically, you’ll pour the thoroughly chilled ice cream base into your pre-frozen ice cream maker bowl and let it churn for about 20-30 minutes, or until it reaches a soft-serve consistency. The churning process incorporates air into the mixture while simultaneously freezing it, creating that characteristic creamy texture. If your ice cream maker has an “add-in” phase, this is not the time for that, as we want the fruit to be fully incorporated into the base. Keep an eye on it, as over-churning can sometimes lead to a slightly icy texture.
Harden and Enjoy:
Once the ice cream has reached a soft-serve consistency, it’s time to firm it up. Transfer the churned ice cream from the ice cream maker into a freezer-safe container. A loaf pan or an airtight plastic container works perfectly. For the best texture, press a piece of parchment paper or plastic wrap directly onto the surface of the ice cream before sealing the container. This helps prevent ice crystals from forming on top. Place the container in the freezer for at least 4 to 6 hours, or until it is firm enough to scoop. The longer it freezes, the harder it will become. When you’re ready to serve, allow the ice cream to sit at room temperature for a few minutes to soften slightly, making it easier to scoop. Spoon into bowls and savor the incredible taste of your homemade strawberry ice cream! It’s a delightful treat that’s perfect on its own or with your favorite toppings.
Conclusion:
And there you have it – your very own batch of incredibly delicious, homemade strawberry ice cream! This recipe truly shines because it allows you to control the sweetness and the intensity of the fresh strawberry flavor, something store-bought options often can’t match. The vibrant, natural taste of ripe strawberries, combined with the creamy, dreamy texture, makes this a truly special treat. I hope you feel inspired to whip up a batch and experience the joy of homemade ice cream.
Serving this luscious strawberry ice cream is a delight in itself! It’s fantastic on its own, of course, but consider topping it with a drizzle of balsamic glaze for a sophisticated twist, a sprinkle of toasted almonds for crunch, or even a dollop of whipped cream and a fresh mint sprig. It also makes an amazing base for milkshakes or a perfect accompaniment to a slice of homemade pie.
Don’t be afraid to experiment with variations! You can add a touch of lemon zest for extra brightness, swirl in some macerated berries for visual appeal and intensified flavor, or even incorporate a splash of vanilla extract to deepen the richness. This recipe is a fantastic starting point for your frozen dessert adventures.
I wholeheartedly encourage you to give this homemade strawberry ice cream recipe a try. It’s surprisingly straightforward and the rewarding taste is absolutely worth it. Enjoy every single spoonful!
Frequently Asked Questions:
Can I make this strawberry ice cream without an ice cream maker?
Absolutely! While an ice cream maker provides the smoothest texture, you can achieve great results by freezing the base in a shallow pan and stirring vigorously with a fork every 30-45 minutes until it reaches a firm, yet scoopable consistency. It might be slightly icier, but still wonderfully delicious.
What’s the best way to ensure my strawberries are super flavorful?
Using ripe, in-season strawberries is key! For an even more intense flavor, consider macerating them first. Simply slice your strawberries, toss them with a tablespoon or two of sugar and a splash of lemon juice, and let them sit for about 30 minutes to an hour. This draws out their natural juices and concentrates their sweetness and aroma.
My ice cream is too hard after freezing. What did I do wrong?
This often happens if the sugar content is too low, or if the ice cream is frozen too solid. Ensure you’re using the recommended amount of sugar, as it helps prevent ice crystals from forming. Also, before serving, let the homemade strawberry ice cream sit at room temperature for about 5-10 minutes to soften slightly. This makes it much easier to scoop and improves the texture.
Homemade Strawberry Ice Cream
A simple and delicious homemade strawberry ice cream recipe using fresh ingredients.
Ingredients
-
1 1/2 cups strawberries, hulled and diced
-
2 Tbsp honey
-
1/2 cup granulated sugar
-
1 tsp lemon juice
-
1 cup heavy whipping cream
-
1/2 cup half and half
-
1 tsp vanilla extract
Instructions
-
Step 1
In a bowl, mash the strawberries with the honey and lemon juice. Let sit for 15 minutes. -
Step 2
In a separate bowl, whisk together the granulated sugar, heavy whipping cream, half and half, and vanilla extract until well combined and the sugar is dissolved. -
Step 3
Gently fold the mashed strawberry mixture into the cream mixture. -
Step 4
Pour the mixture into your ice cream maker and churn according to the manufacturer’s instructions. -
Step 5
Transfer the ice cream to an airtight container and freeze for at least 2-3 hours, or until firm.
Important Information
Nutrition Facts (Per Serving)
It is important to consider this information as approximate and not to use it as definitive health advice.
Allergy Information
Please check ingredients for potential allergens and consult a health professional if in doubt.