French Macaron Recipe-Perfect Homemade Treat
French Macaron Recipe: Your Gateway to Delicate Bliss!
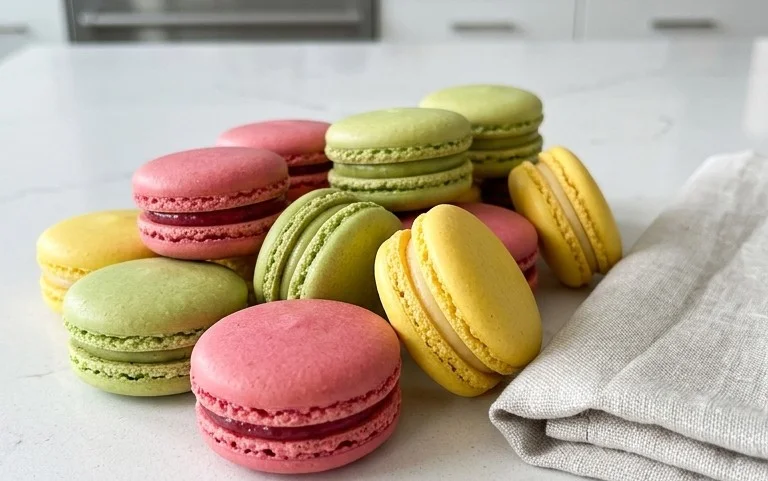
Are you ready to embark on a culinary adventure that promises exquisite flavor and unparalleled elegance? Learning to craft the perfect French macaron is a journey many home bakers dream of, and today, I’m here to guide you step-by-step through making these iconic little delights. There’s a certain magic to a well-executed French macaron: the crisp shell that gives way to a soft, chewy interior, all nestled around a luscious filling. It’s this delightful textural contrast, coupled with endless flavor possibilities, that makes the French macaron a universally adored treat. What truly sets them apart is their delicate nature; achieving that signature “foot” and smooth, uncracked surface requires precision and a touch of patience, but the reward is a confection that feels both sophisticated and wonderfully indulgent. Prepare to impress yourself and everyone lucky enough to taste your homemade French macarons!
French Macaron Recipe
Creating perfect French macarons can feel like a culinary rite of passage. These delicate, airy cookies with their crisp shells and chewy interior are a testament to precision and patience. While they have a reputation for being tricky, with a clear understanding of the process and a few key tips, you can achieve beautiful, delicious macarons in your own kitchen. This recipe focuses on the classic French method, emphasizing a stable meringue and careful handling for the best results. Get ready to embark on a sweet adventure!
Ingredients:
Preparation and Mise en Place
Before you begin extract, gather all your ingredients and equipment. Accuracy is paramount in macaron making, so weighing your ingredients is highly recommended over using volume measurements. Ensure your egg whites are at room temperature; this helps them whip up to a more stable and voluminous meringue. If your almond flour isn’t super-fine, you can pulse it briefly in a food processor with the powdered sugar to achieve a finer texture, but be careful not to over-process, which can release oils and make the flour gummy. Sifting is crucial for removing any lumps and ensuring a smooth cookie shell.
Step-by-Step Instructions
1. Prepare the Dry Ingredients and Meringue Base: In a medium bowl, whisk together the sifted almond flour, powdered sugar, and salt. Sifting these together ensures they are well combined and free of any remaining lumps. Set this mixture aside. In the clean, grease-free bowl of your stand mixer (or a large bowl if using a hand mixer), add the room-temperature egg whites. Start whipping the egg whites on medium-low speed until they become foamy and opaque. Gradually increase the speed to medium-high, and slowly begin extract to add the granulated sugar, a tablespoon at a time, while the mixer is running. Continue whipping until stiff, glossy peaks form. This means that when you lift the whisk attachment, the peaks stand straight up and don’t curl over. This is your French meringue.
2. Color and Flavor the Meringue: Once you have achieved stiff peaks, add the liquid-gel food coloring and pure vanilla extract to the meringue. If using a gel coloring, start with a small amount and add more if you desire a deeper color. Gel colors are more concentrated and won’t add excess liquid like liquid food coloring can. Continue to mix on medium-high speed for another 30-60 seconds to ensure the color is evenly distributed and the meringue is still stiff and glossy. The meringue should be thick enough to hold its shape firmly.
3. Macaronage: The Folding Process: This is arguably the most critical stage. Add about one-third of the dry ingredient mixture (almond flour, powdered sugar, salt) to the meringue. Using a spatula, gently fold the dry ingredients into the meringue. Use a motion that involves scraping down the sides of the bowl and then cutting through the center. Rotate the bowl as you fold. Once mostly incorporated, add the remaining dry ingredients in two more additions, continuing the folding process. You are looking for a batter consistency that flows like lava or thick ribbon. When you lift the spatula, the batter should fall off in a thick, continuous stream that slowly melts back into the rest of the batter. If the batter is too stiff, it will break into pieces; if it’s too thin, it will spread too much and won’t develop feet. This stage is called “macaronage.”
4. Piping the Macaron Shells: Prepare two baking sheets by lining them with parchment paper or silicone baking mats. If using parchment paper, you can draw circles on the underside to guide your piping, or use a template. Transfer the macaron batter to a piping bag fitted with a round tip (about 1/2 inch or 1 cm in diameter). Hold the piping bag perpendicular to the baking sheet and pipe small, even circles, leaving about 1 inch between each macaron. Try to maintain consistent pressure for uniform sizes. Once you have piped all the batter, tap the baking sheets firmly on the counter several times. This helps to release any trapped air bubbles and also encourages the macarons to spread slightly into more rounded shapes.
5. Resting and Baking: After tapping the baking sheets, let the piped macarons rest at room temperature for 30-60 minutes, or until they have developed a dry skin. You should be able to gently touch the surface of a macaron without any batter sticking to your finger. This “skin” is essential for developing the characteristic “feet” – the ruffled edge at the bottom of the macaron. Preheat your oven to 300°F (150°C). Bake one sheet at a time for 12-18 minutes, or until the macarons are firm and don’t wobble when gently nudged. The baking time will vary depending on your oven. You can check for doneness by carefully lifting one macaron; if it lifts cleanly from the parchment paper, it’s ready.
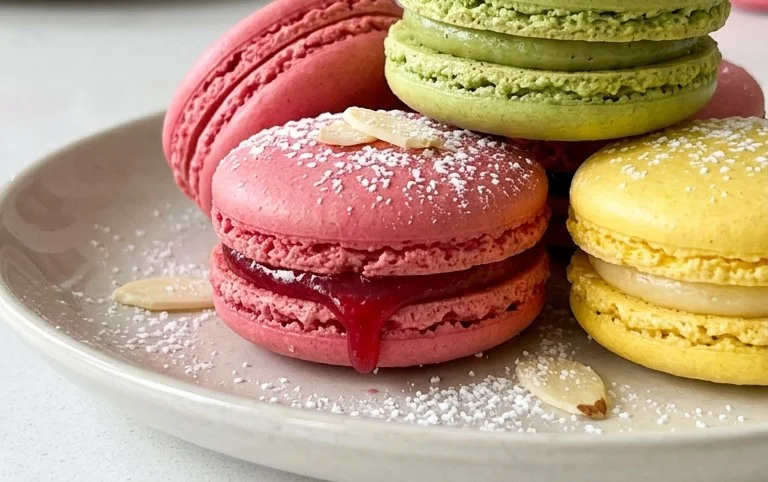
6. Cooling and Filling: Once baked, remove the baking sheets from the oven and let the macarons cool completely on the baking sheets before attempting to remove them. This is important as they will be fragile when warm. Once cooled, carefully peel the macaron shells off the parchment paper or silicone mat. If they stick, they may need a little more baking time. Pair up similar-sized macaron shells. Fill one shell with your chosen filling (vanilla buttercream, ganache, jam, etc.) and gently top with another shell, twisting slightly to distribute the filling.
Notes on Ingredients and Process:
Sifting Almond Flour: Measure your almond flour after* sifting. Sifting removes any large particles and ensures a smooth batter, which is crucial for the delicate texture of macarons.
Enjoy your homemade French macarons! They are best enjoyed after resting in an airtight container in the refrigerator for at least 24 hours, which allows the flavors to meld and the shells to soften slightly, creating that perfect chewy texture.
Conclusion:
You’ve navigated the delightful journey of creating perfect French macarons! This recipe is truly wonderful because it breaks down the often-intimidating process into manageable steps, resulting in those signature delicate shells with a chewy interior and a satisfyingly crisp exterior. The beauty of these little cookies lies in their elegance and versatility. Imagin extracte presenting a platter of these homemade treats at your next gathering – they are guaranteed to impress!
Serving suggestions abound: enjoy them with a cup of coffee or tea, as a sophisticated dessert, or even as part of a larger dessert spread. For variations, don’t be afraid to experiment with your filling! Think classic chocolate ganache, tangy raspberry jam, or even a zesty lemon curd. You can also play with the macaron shell colors to match any occasion. I wholeheartedly encourage you to give this French macaron recipe a try. It might seem daunting at first, but with a little patience and practice, you’ll be a macaron master in no time!
Frequently Asked Questions:
Why are my macaron shells cracked?
Cracked shells are often a result of overbeating the meringue, improper oven temperature, or not letting the macarons “rest” or “form a skin” before baking. Ensure your oven is accurately calibrated and allow the piped shells to dry slightly at room temperature until they form a matte, dry surface to the touch.
My macarons are hollow, what went wrong?
Hollow macarons can be caused by a few things. The meringue might not have been stiff enough, or the shells may have been underbaked. Make sure to whip your egg whites to stiff, glossy peaks, and monitor the baking time closely. They should feel firm when gently touched.
Can I make French macarons ahead of time?
Absolutely! Macarons are actually best enjoyed a day after they are made. This allows the filling to soften the shells slightly, creating that perfect chewy texture. Store them in an airtight container in the refrigerator.
French Macaron Recipe
A classic French macaron recipe for delicate, chewy meringue cookies with a smooth filling.
Ingredients
-
150 grams sifted super-fine almond flour
-
180 grams powdered sugar
-
1/4 teaspoon salt
-
120 grams large egg whites (at room temperature)
-
60 grams granulated sugar
-
4 drops liquid-gel food coloring
-
1 teaspoon pure vanilla extract
-
Vanilla Buttercream Frosting or your choice of filling
Instructions
-
Step 1
Sift together the almond flour, powdered sugar, and salt into a bowl. Whisk to combine. -
Step 2
In a separate, clean bowl, whisk the egg whites until frothy. Gradually add the granulated sugar, a tablespoon at a time, while whisking until stiff, glossy peaks form. Stir in the food coloring and vanilla extract. -
Step 3
Gently fold the dry ingredients into the meringue in two additions until just combined. The batter should flow like lava. Do not overmix. -
Step 4
Transfer the batter to a piping bag fitted with a round tip. Pipe small, uniform rounds onto parchment-lined baking sheets. -
Step 5
Tap the baking sheets firmly on the counter to release any air bubbles. Let the macarons sit at room temperature for 30-60 minutes, or until a skin has formed. -
Step 6
Bake in a preheated oven at 300°F (150°C) for 15 minutes, or until the macarons have developed ‘feet’ and are no longer sticky to the touch. -
Step 7
Let the macarons cool completely on the baking sheets before carefully removing them. Once cooled, pair macarons of similar size and pipe your chosen filling onto one side, then sandwich with the other.
Important Information
Nutrition Facts (Per Serving)
It is important to consider this information as approximate and not to use it as definitive health advice.
Allergy Information
Please check ingredients for potential allergens and consult a health professional if in doubt.