Easy French Dip Squares Recipe Delicious Appetizer
French Dip Squares are about to become your new favorite weeknight wonder. Who doesn’t adore the classic French Dip sandwich? That tender roast beef, the savory au jus, the perfectly toasted bread – it’s pure comfort in every bite. But let’s be honest, sometimes a full sandwich feels like a bit of a production. That’s where these incredible French Dip Squares shine. We’ve taken all the beloved flavors of the iconic French Dip and reimagin extracted them into an effortlessly delicious and utterly irresistible baked treat. Imagin extracte layers of flaky pastry cradling succulent beef, all bathed in that rich, aromatic jus, and baked to golden perfection. These French Dip Squares are a game-changer, offering all the satisfying goodness you crave in a more manageable, shareable, and frankly, more fun format. Get ready to impress yourself and everyone around you with this ingenious twist on a timeless favorite.
French Dip Squares
Are you craving that classic French Dip sandwich experience but want something a little more bite-sized and easier to handle? Look no further! French Dip Squares are the answer. These delightful little parcels capture all the savory, cheesy goodness of a traditional French Dip, all wrapped up in a flaky, buttery crust. They’re perfect for game day, parties, or even a fun weeknight dinner. The best part? They are incredibly simple to make, requiring minimal effort for maximum flavor payoff. We’re taking all the components you love – tender roast beef, melty Swiss cheese, and that rich, umami-packed dipping au jus – and transforming them into an irresistible appetizer or main course. Get ready to impress your friends and family with these crowd-pleasing French Dip Squares!
Ingredients:
Cooking Instructions
This recipe breaks down into a few easy phases: preparing the filling, assembling the squares, baking them to golden perfection, and finally, creating that essential dipping broth. Let’s get started!
1.
Preparing the Filling
First, we need to prepare our flavorful roast beef filling. In a medium-sized bowl, combine the deli-sliced roast beef. You’ll want to gently break apart the slices a bit so they are easier to distribute evenly within the crescent roll dough. Next, add the grated Swiss cheese over the roast beef. This melty, nutty cheese is a classic pairing with roast beef and adds a wonderful richness. Then, sprinkle the entire packet of dry onion soup mix over the roast beef and cheese. This is where a lot of that classic French Dip flavor comes from! Give everything a gentle toss to evenly distribute the cheese and soup mix amongst the roast beef. This mixture will form the hearty, savory core of our French Dip Squares.
2.
Crafting the Butter Mixture and Assembling the Base
Now, let’s create a luscious butter mixture that will add incredible flavor and help the crescent rolls crisp up beautifully. In a small bowl, whisk together the melted butter, Worcestershire sauce, and garlic powder. The Worcestershire sauce adds a layer of complex umami, while the garlic powder provides a subtle savory kick. This mixture will be brushed over the crescent roll dough. Open one can of the refrigerated crescent rolls and carefully unroll the dough onto a lightly floured surface. Press the perforations together to form a solid rectangle. Don’t worry if it’s not perfectly even; rustic charm is part of the appeal! Now, generously brush this flavorful butter mixture all over the surface of the dough, making sure to get close to the edges. This is a crucial step for flavor and texture.
3.
Layering the Filling and Creating the Squares
Once the butter mixture is applied, it’s time to add our roast beef and cheese filling. Evenly distribute the prepared roast beef, Swiss cheese, and onion soup mix mixture over the buttered crescent roll dough. Try to spread it as uniformly as possible, leaving a small border around the edges of the dough. This border will help to seal in the filling. Now, carefully unroll the second can of crescent rolls and place it directly on top of the filling. Again, gently press the perforations together to form a seamless top layer. You can then lightly press down on the entire surface with your hands to help the layers adhere. Using a sharp knife or a pizza cutter, carefully cut the layered dough into squares. Aim for roughly 2-inch by 2-inch squares. Don’t be afraid to cut through all the layers.
4.
Baking to Golden Perfection
Preheat your oven to 375 degrees Fahrenheit (190 degrees Celsius). Line a baking sheet with parchment paper or a silicone baking mat. This will prevent sticking and make for easier cleanup. Carefully transfer the cut squares onto the prepared baking sheet, leaving a little space between each one. You can gently press down on the edges of each square again with your fingers to ensure they are senon-alcoholic aled well, preventing too much filling from escaping during baking. Once your oven is preheated, place the baking sheet in the center rack. Bake for approximately 18-22 minutes, or until the crescent roll dough is puffed up, golden brown, and cooked through. Keep an eye on them, as oven temperatures can vary. You want them to be beautifully golden, indicating that the dough is crisp and the cheese inside is melted and gooey.
5.
Preparing the Dipping Au Jus and Serving
While your French Dip Squares are baking, it’s time to prepare the essential dipping au jus. In a small saucepan, heat the 1 cup of beef broth over medium heat until it is warm. You don’t need to bring it to a rolling boil, just a gentle simmer is perfect. This warm broth is what you’ll use to dip your delicious squares into, mimicking the classic French Dip experience. Once the squares are out of the oven and have cooled slightly for a minute or two (you don’t want to burn yourself!), they are ready to be served. Arrange the golden-brown French Dip Squares on a serving platter. Pour the warm beef broth into a small serving bowl. To enjoy, simply pick up a square, dip it generously into the warm beef broth, and savor the incredible combination of flaky pastry, savory roast beef, melted cheese, and that rich, flavorful dipping sauce. These are best served warm for optimal flavor and texture. Enjoy your delightful homemade French Dip Squares!
Conclusion:
And there you have it – your very own French Dip Squares! I truly hope you enjoy making and, more importantly, devouring these delightful little bites. They are fantastic because they deliver all the savory, comforting flavor of a classic French Dip sandwich in a convenient, bite-sized package. The tender roast beef, melted provolone, and that deeply flavorful au jus are a match made in culinary heaven, perfect for parties, game days, or even a special weeknight treat. For serving, consider pairing them with a crisp side salad or some oven-baked fries to round out the meal. Don’t be afraid to get creative with variations! You could easily swap the provolone for Swiss or Gruyere, add a touch of Dijon mustard to the beef, or even incorporate caramelized onions for an extra layer of sweetness. I wholeheartedly encourage you to give these French Dip Squares a try; they are guaranteed to become a new favorite!
Frequently Asked Questions:
Can I make these ahead of time?
Yes, you absolutely can! You can assemble the French Dip Squares up to a day in advance. Store them covered in the refrigerator. When ready to bake, you might need to add a few extra minutes to the baking time to ensure they are heated through. It’s also a good idea to warm the au jus separately.
What kind of bread works best for French Dip Squares?
A sturdy, slightly chewy bread is ideal. Puff pastry is my top recommendation as it bakes up beautifully golden and flaky, providing a wonderful contrast to the tender beef. If you don’t have puff pastry, a good quality dinner roll or even small pieces of baguette can work, though they might absorb more of the jus.
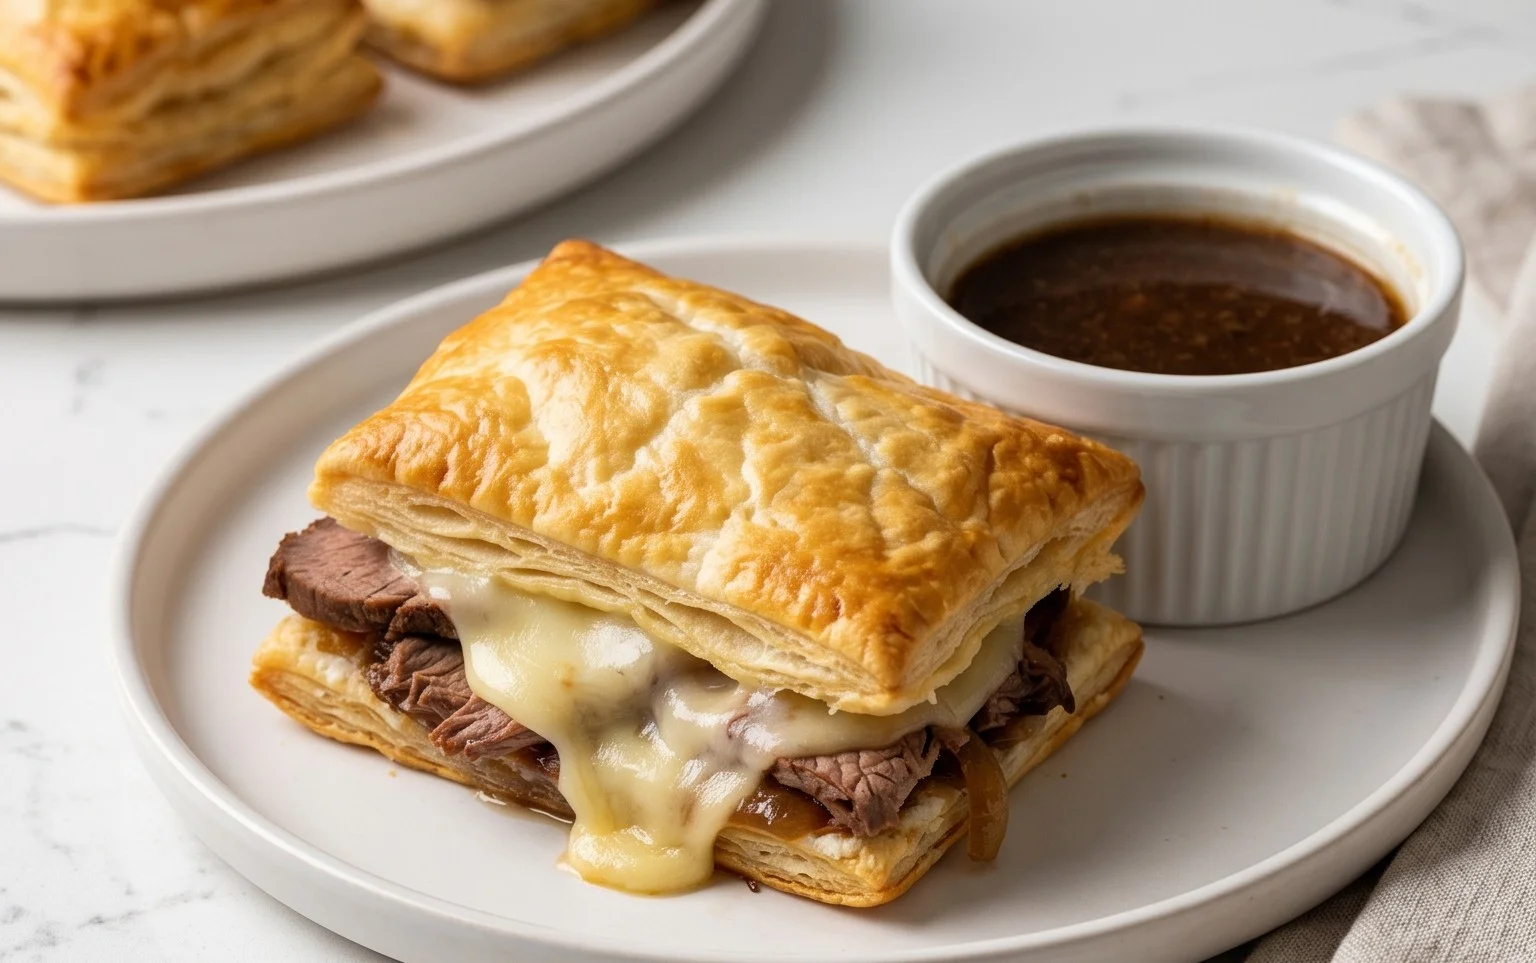
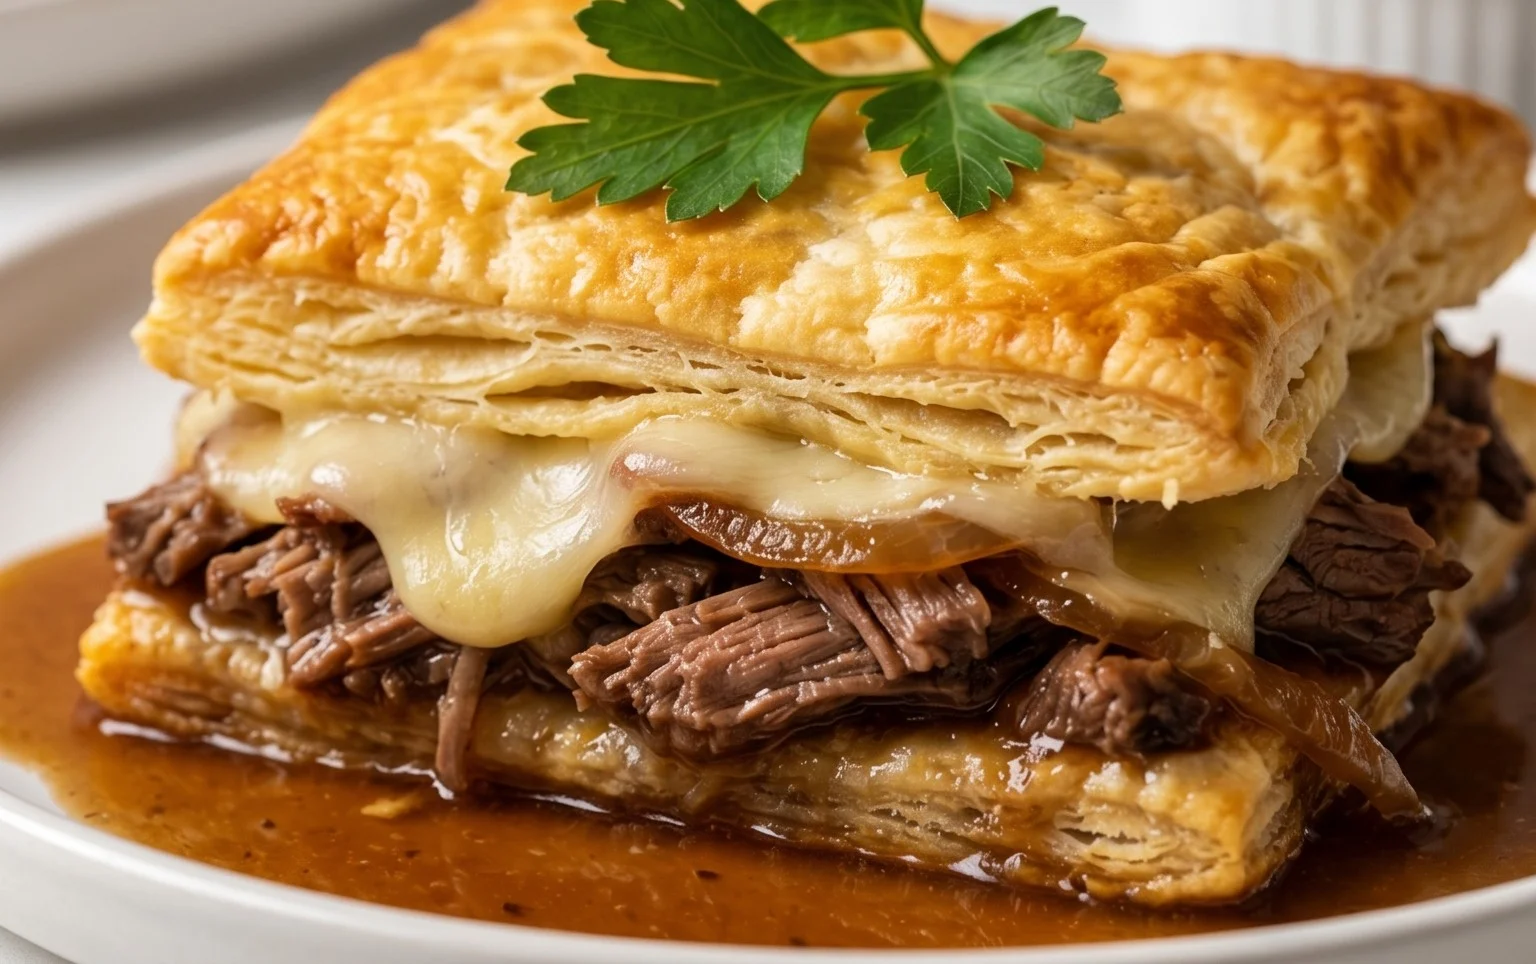
French Dip Squares
A quick and easy appetizer or light meal featuring savory roast beef, Swiss cheese, and a rich dipping sauce, all baked inside flaky crescent roll dough.
Ingredients
-
2 cans refrigerated crescent rolls
-
1/2 pound deli-sliced roast beef, chopped
-
1 cup grated Swiss cheese
-
1 packet dry onion soup mix
-
1/4 cup melted butter
-
1 teaspoon Worcestershire sauce
-
1/2 teaspoon garlic powder
-
1 cup beef broth (for dipping)
Instructions
-
Step 1
Preheat oven to 375°F (190°C). Grease a 9×13 inch baking pan. -
Step 2
Unroll one can of crescent rolls and press into the bottom of the prepared baking pan to form a crust. -
Step 3
In a bowl, combine the chopped roast beef, Swiss cheese, dry onion soup mix, melted butter, Worcestershire sauce, and garlic powder. Mix well. -
Step 4
Spread the roast beef mixture evenly over the crescent roll crust. -
Step 5
Unroll the second can of crescent rolls and place on top of the roast beef mixture, pinching the seams together to seal. -
Step 6
Bake for 20-25 minutes, or until golden brown and heated through. -
Step 7
While baking, warm the beef broth in a small saucepan for dipping. -
Step 8
Cut the baked squares into individual portions and serve immediately with warm beef broth for dipping.
Important Information
Nutrition Facts (Per Serving)
It is important to consider this information as approximate and not to use it as definitive health advice.
Allergy Information
Please check ingredients for potential allergens and consult a health professional if in doubt.