Homemade Oreo Cookies-Easy & Delicious Recipe
Homemade Oreo Cookies are more than just a treat; they’re a nostalgic journey back to childhood, a comforting embrace in cookie form. Who among us hasn’t succumbed to the irresistible allure of that signature black cocoa cookie and creamy white filling? There’s a magical simplicity to an Oreo, a perfect balance of textures and a satisfyingly sweet flavor that has captivated taste buds for generations. But what if I told you that you could recreate that beloved flavor and iconic look right in your own kitchen? Forget those store-bought packages! Making homemade Oreo cookies is an incredibly rewarding experience, and the results are truly spectacular, often surpassing the origin extractal in richness and depth. We’re talking about a deeply chocolatey, perfectly crisp cookie sandwich, just waiting for you to dunk it into a tall glass of milk. Ready to embark on this delicious adventure and master the art of the perfect homemade Oreo cookie?
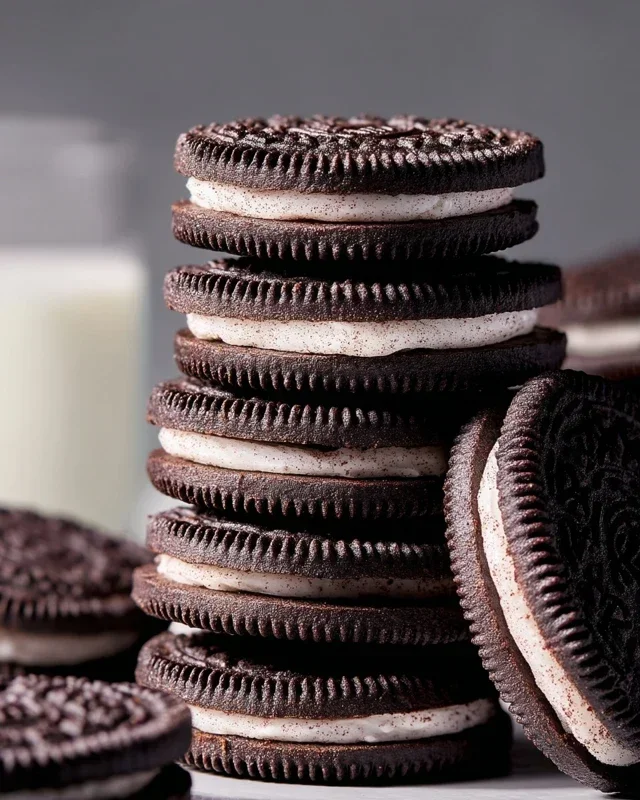
Homemade Oreo Cookies
There’s something undeniably satisfying about biting into a classic Oreo cookie. That perfect balance of a crisp, chocolatey cookie sandwiching a sweet, creamy filling is a flavor combination that has delighted generations. While store-bought Oreos are convenient, there’s a unique joy in recreating this iconic treat in your own kitchen. The process is surprisingly accessible, and the result is a batch of cookies that not only taste incredible but also fill your home with an irresistible aroma. We’re going to embark on a journey to craft these delightful dark chocolate cookies from scratch, including that signature white creme filling. Get ready to impress yourself and anyone lucky enough to share these homemade wonders!
Ingredients:
Crafting the Chocolate Cookie Dough
The foundation of our homemade Oreos lies in a rich, dark chocolate cookie. The key to achieving that classic Oreo color and intense chocolate flavor is using a good quality Dutch-process cocoa powder. For an even deeper, almost black hue and a more intense chocolate taste, you can opt for black cocoa powder, which is a specialty ingredient that truly elevates these cookies. Don’t skip sifting your dry ingredients – this ensures an even distribution and prevents any clumps, leading to a smoother dough and more uniform cookies.
1. Combine Dry Ingredients: In a medium bowl, whisk together the all-purpose flour, cocoa powder, baking soda, baking powder, and 1/4 teaspoon of fine sea salt. Whisking well ensures that the leavening agents and salt are evenly distributed throughout the flour mixture. This is a crucial step for consistent baking. Set this bowl aside.
2. Cream Butter and Sugar: In a large bowl, or the bowl of your stand mixer fitted with the paddle attachment, cream together the 1 cup (200 grams) of granulated sugar and the 10 tablespoons (142 grams) of unsalted butter. Beat these together on medium speed until the mixture is light and fluffy, and the sugar is well incorporated. This process, known as creaming, incorporates air into the butter and sugar mixture, which contributes to the cookie’s texture. Scrape down the sides of the bowl occasionally to ensure everything is evenly mixed.
3. Incorporate Egg and Vanilla: Add the room-temperature large egg to the creamed butter and sugar mixture. Beat on medium speed until just combined. Then, add the 2 ½ teaspoons of pure vanilla extract and beat again until it’s fully incorporated. Room temperature ingredients emulsify better, leading to a smoother dough.
4. Combine Wet and Dry Ingredients: Gradually add the dry ingredients to the wet ingredients, mixing on low speed until just combined. Be careful not to overmix the dough at this stage. Overmixing can develop the gluten in the flour too much, resulting in tough cookies. The dough will be quite stiff and dark.
5. Chill the Dough: Divide the dough in half, flatten each half into a disc, wrap them tightly in plastic wrap, and refrigerate for at least 1 hour, or until firm. Chilling the dough is essential. It not only makes the dough easier to handle and roll out but also allows the flavors to meld and prevents the cookies from spreading too much during baking. You can even chill it overnight for a deeper flavor.
Shaping and Baking the Cookies
Once the dough has chilled sufficiently, it’s time to bring our Oreo cookies to life through shaping and baking. Precision here will help you achieve that classic round cookie appearance.
6. Roll and Cut the Dough: Preheat your oven to 350°F (175°C). Line baking sheets with parchment paper. Working with one disc of dough at a time (keep the other chilled), lightly flour your work surface and a rolling pin. Roll out the dough to about 1/8 to 1/4 inch thickness. You want them to be thin enough to bake through but not so thin that they become brittle. Use a round cookie cutter, about 1.5 to 2 inches in diameter, to cut out your cookie shapes. Gently re-roll scraps as needed, being careful not to overwork the dough.
7. Bake to Perfection: Carefully transfer the cut-out cookies to the prepared baking sheets, leaving about 1 inch of space between them. Bake for 9-11 minutes, or until the edges are set and the cookies feel firm to the touch. They won’t appear overly crisp when they come out of the oven; they will continue to firm up as they cool. Avoid overbaking, as this can make them dry. Let the cookies cool on the baking sheets for a few minutes before transferring them to a wire rack to cool completely. Ensure they are entirely cool before attempting to fill them.
Whipping Up the Classic Creme Filling
Now for the sweet, luscious creme filling that defines the Oreo experience. This part is wonderfully simple and incredibly rewarding.
8. Prepare the Creme Filling: In a medium bowl, beat the 1 stick (113 grams) of unsalted butter (also at a cool room temperature) until smooth and creamy. Gradually add the sifted 2 ½ cups (313 grams) of powdered sugar and 1/8 teaspoon of fine sea salt. Beat on low speed until the sugar is incorporated, then increase the speed to medium-high and beat until the filling is light, fluffy, and smooth. If the filling seems too thick, you can add a tiny splash (1/2 teaspoon at a time) of milk or heavy cream to reach your desired consistency. If it seems too thin, add a little more sifted powdered sugar.
Assembling Your Homemade Oreos
The final, most exciting step is bringin extractg the cookie and creme together to create your very own Oreo masterpiece.
9. Assemble the Cookies: Once the cookies are completely cooled, spoon or pipe about 1-2 teaspoons of the creme filling onto the flat side of one cookie. Gently place another cookie on top, pressing down slightly to spread the filling to the edges. Repeat this process with the remaining cookies. For that authentic Oreo look, you can use a piping bag with a round tip for a neater application of the creme.
Enjoy your incredibly delicious, homemade Oreo cookies! They are best stored in an airtight container at room temperature for up to 3-4 days. The effort is truly worth the reward!
Conclusion:
Baking your own homemade Oreo cookies is a truly rewarding experience, transforming your kitchen into a haven of delicious, familiar flavors with a personal touch. The satisfaction of replicating that iconic taste and texture from scratch, knowing exactly what goes into each delectable bite, is unparalleled. These cookies are not just a treat; they’re a project of love that yields incredibly delicious results. Whether you’re a seasoned baker or just starting out, this recipe offers a straightforward path to cookie perfection.
Serve these glorious homemade Oreos with a tall glass of cold milk for the ultimate classic pairing. They also make a delightful addition to ice cream sundaes, crushed into cheesecake bases, or even layered into trifles. Don’t be afraid to experiment with variations! Consider adding a pinch of espresso powder to the chocolate dough for a mocha twist, or swirling in some caramel for a salted caramel Oreo experience. You could also experiment with different extracts like peppermint or almond.
I wholeheartedly encourage you to give this recipe a try. The process is enjoyable, and the outcome is undeniably worth it. Prepare to impress yourself and everyone lucky enough to share these incredible homemade cookies with you!
Frequently Asked Questions about Homemade Oreo Cookies:
Why are my homemade Oreos not as dark as store-bought ones?
The deep black color of commercial Oreos is often achieved with specific food colorings. For a rich, dark chocolate flavor without artificial colors, we use a generous amount of high-quality dark cocoa powder. You can try Dutch-processed cocoa for a slightly deeper hue and smoother flavor, or add a tiny drop of black food coloring if you desire that intense black color.
Can I make these cookies vegan?
Absolutely! This recipe is quite adaptable. To make your homemade Oreo cookies vegan, simply substitute the butter with a vegan butter alternative and use a plant-based milk (like almond or soy milk) for the cream filling. Ensure your chocolate chips are also dairy-free if you choose to add them to the cookies themselves.
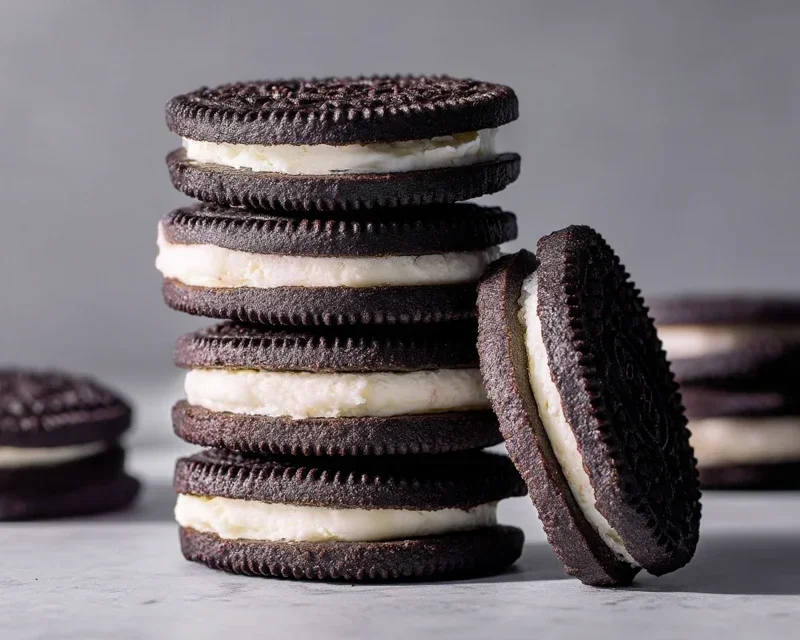
Homemade Oreo Cookies
Recreate the classic chocolate sandwich cookie with this homemade Oreo recipe, featuring a crisp dark chocolate cookie and a creamy vanilla filling.
Ingredients
-
1 1/4 cups (159 grams) all-purpose flour
-
1/2 cup (43 grams) Dutch-process cocoa powder
-
1 teaspoon baking soda
-
1/4 teaspoon baking powder
-
1/4 teaspoon fine sea salt
-
1 cup (200 grams) granulated sugar
-
10 tablespoons (142 grams) unsalted butter, at a cool room temperature, cut into chunks
-
1 large egg, at room temperature
-
1 stick (113 grams) unsalted butter, at a cool room temperature
-
2 1/2 teaspoons pure vanilla extract
-
2 1/2 cups (313 grams) powdered sugar, sifted
-
1/8 teaspoon fine sea salt
Instructions
-
Step 1
Whisk together the flour, cocoa powder, baking soda, baking powder, and 1/4 teaspoon salt in a medium bowl. Set aside. -
Step 2
In a large bowl, cream together the granulated sugar and the first amount of butter until light and fluffy. -
Step 3
Beat in the egg and vanilla extract until well combined. -
Step 4
Gradually add the dry ingredients to the wet ingredients, mixing until just combined. The dough will be stiff. -
Step 5
Divide the dough in half, flatten each half into a disc, wrap in plastic wrap, and refrigerate for at least 1 hour. -
Step 6
Preheat oven to 350°F (175°C). Line baking sheets with parchment paper. -
Step 7
On a lightly floured surface, roll out one disc of dough to about 1/8-inch thickness. Cut out circles using a 1.5-inch round cutter. -
Step 8
Place cookies on prepared baking sheets and bake for 10-12 minutes, or until firm. -
Step 9
Let cookies cool on baking sheets for 5 minutes before transferring to wire racks to cool completely. -
Step 10
For the filling, beat together the second amount of butter, sifted powdered sugar, and 1/8 teaspoon salt until smooth and creamy. -
Step 11
Once cookies are completely cool, spread a dollop of filling on the flat side of one cookie and top with another cookie.
Important Information
Nutrition Facts (Per Serving)
It is important to consider this information as approximate and not to use it as definitive health advice.
Allergy Information
Please check ingredients for potential allergens and consult a health professional if in doubt.